Your cart (0)
Your cart is empty
Tax included and shipping calculated at checkout
Recommended products


Drawer menu
Tax included and shipping calculated at checkout


Are you looking for a project that blends rustic charm with modern functionality?
Mastering wooden floating shelves DIY allows you to create storage that is strong, customized, and bursting with personality.
Unlike store-bought options, building your own with solid wood ensures superior quality and a unique, handcrafted finish.
The wood is the soul of your shelf. Choosing the right species determines the shelf's aesthetic, durability, and cost. This first step is critical to a successful wooden floating shelves DIY.
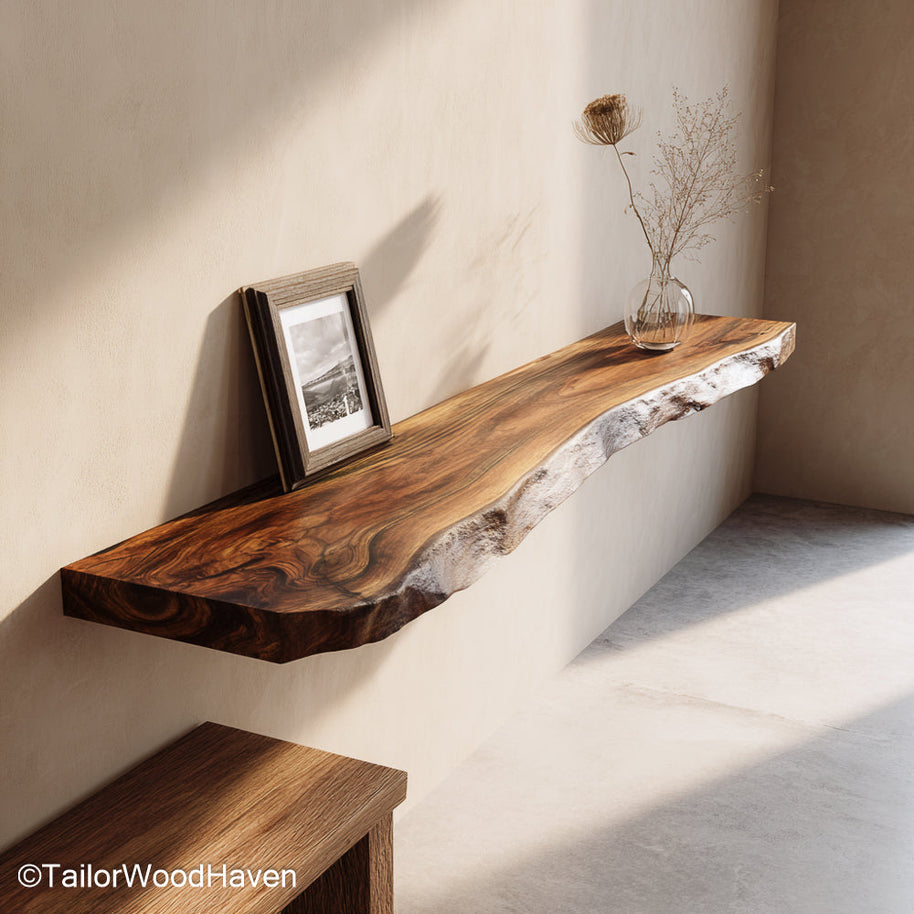
These solid hardwood floating shelves with an oil finish and clean edges are perfect for open displays and wall-mounted decor in the living room.
Choosing the right wood species is the single most important factor for the longevity and finished appearance of your project.
Each wood type offers a different balance of durability, cost, and visual character. Consider the intended load and location before making your final choice.
|
Wood Type |
Key Characteristics |
Best Use for DIY Shelves |
|
White Oak |
Extremely durable, dense, prominent grain. Resists warping. |
Heavy-duty kitchens, professional offices, and living rooms. |
|
Pine (Select Grade) |
Affordable, soft, lightweight, and stains easily. |
Light decor, bathrooms, budget-friendly wooden floating shelves DIY. |
|
Walnut |
Rich, deep brown color, beautiful grain. High cost, high visual impact. |
Minimalist decor, luxurious accents, focal pieces. |
|
Maple |
Very hard, fine-grained, takes paint and light stains beautifully. |
Modern, clean aesthetic, high-traffic areas. |
Tip: While Pine is budget-friendly, its softness makes it prone to dents. If strength is your top priority, invest in a hardwood like Oak or Maple.
When selecting your boards, pay attention to the grain pattern. Look for boards with straight, tight grain, which indicates strength.
If you want a natural, rustic look, look for "live edge" slabs. For a modern, minimalist look, choose boards that are straight-grained and flat-sawn.
Finding the perfect grain is key to a beautiful result in your wooden floating shelves DIY.
Consider reclaimed barn wood or salvaged lumber.
Reclaimed wood often has a beautiful, natural patina that instantly adds character, making your wooden floating shelves DIY project unique and environmentally conscious.
Just ensure the wood is structurally sound and free of pests.
These nursery-style floating shelves are made from eco-friendly, durable, and aesthetic soft white wood with safe rounded edges, ideal for books and decor.
The construction of the shelf itself is surprisingly straightforward, relying on accurate cutting and meticulous finishing. This phase defines the quality of your finished wooden floating shelves DIY.
Measure Twice, Cut Once
Measure the exact length you need. If cutting multiple shelves, cut them all simultaneously to ensure perfect consistency.
Square Cuts
Use a miter saw (or have the hardware store cut) to ensure every cut is perfectly square (90 degrees). A non-square cut will leave a visible gap where the shelf meets the wall.
Routing (Key Step)
This is where the shelf becomes "floating". You must precisely mark and drill the holes or channels in the back edge of the solid wood to accept the hidden steel bracket rods.
Misalignment here will make installation impossible, sabotaging your wooden floating shelves DIY efforts.
Sanding is the secret to a professional-grade finish:
Progression
Start with 80-grit to remove deep marks, move to 120-grit, and finish with 220-grit for a silky smooth feel.
Edge Softening
Lightly round the sharp corners and edges. This detail makes the shelf feel premium and less like raw lumber.
Apply wood conditioner before staining soft woods (like pine) to ensure even color. Apply your stain of choice (wipe on, wipe off) and finish with a durable sealant (polyurethane or wax oil) for protection against moisture and wear.
Chris Loves Julia’s DIY shelves are a great example of how solid wood can completely transform a space, inspiring the aesthetic potential of your wooden floating shelves DIY project.
Building for books or heavy storage requires prioritizing strength in three areas: the wood, the bracket, and the wall attachment. The goal is to maximize stability for your wooden floating shelves DIY.
This floating shelf hardware set includes brackets, anchors, and instructions, making it suitable for securely installing any solid wood shelf.
Depth-to-Thickness Ratio
Ensure the shelf is thick enough for its depth. For heavy-duty use, aim for at least 1 inch of thickness for every 5 inches of depth (e.g., a 2-inch thick shelf for a 10-inch depth).
Internal Support
For very long spans (over 4 feet) or extremely heavy loads, you may need brackets with cross-bracing or internal metal reinforcement hidden within the shelf structure.
If the shelf is near a heat source or high humidity (like a kitchen sink), use a durable sealant (like marine-grade polyurethane) to prevent warping over time.
Designing your wooden floating shelves DIY for the environment they live in ensures their longevity.
Use high-quality, heavy-duty steel rod brackets designed specifically for solid wood. These rods need to penetrate the wood at least 6-8 inches to maximize load distribution and prevent wobbling.
For renters or homeowners with sensitive wall finishes, permanent drilling may not be an option. You can still achieve a floating look for light decor, finding an alternative approach to your wooden floating shelves DIY.
Adhesive Mounting
Use heavy-duty, removable adhesive strips (like high-weight Command Strips) for very lightweight, short shelves. This is strictly for small photos, spices, or lightweight keys.
Tiled Walls
If mounting on tile, avoid drilling entirely. Use commercial-grade construction adhesive tape or epoxy designed for ceramics if the shelf is intended to be permanent, or rely on adhesive strips for a removable display.
Any damage-free approach significantly reduces the shelf's load capacity.
If you’re looking for a tool-free method, The Ruthless Maker’s 2-minute shelf trick is surprisingly strong and renter-friendly, offering an excellent alternative for your wooden floating shelves DIY when drilling is not possible.
When creating a functional storage solution, your installation process must be governed by structural engineering principles.
Thickness
For heavy-duty use (books, dishes), the shelf should be a minimum of 2 inches thick to resist sagging.
Wall Studs
Always anchor your main support bracket directly into wall studs. Use a high-quality stud finder and confirm the stud's location with a small finishing nail before drilling the main pilot hole.
Anchor Choice
If you cannot hit a stud, use toggle bolts or snap toggles designed for extremely heavy loads. Never use plastic anchors for a solid wood floating shelf.
Ensure the bracket size matches the shelf size.
The mounting plate of the bracket should be long enough to hit at least two wall studs (ideally 32 inches or 48 inches wide).
The steel rods must be sized to fill the routed hole snugly for a secure, non-wobbly fit. Getting this right is the most critical technical step in your wooden floating shelves DIY.
Even when using anchors and screws for the mounting hardware, the shelf itself can often be secured to the bracket without visible fasteners (nails or screws) penetrating the shelf surface, achieving a clean aesthetic vital to a high-quality wooden floating shelves DIY.
If your design uses a hollow-core box shelf over a wooden cleat:
Secure Cleat: Anchor the wooden cleat securely to the wall studs.
Glue Shell:
Slide the wooden shell over the cleat and secure the shell to the cleat with high-strength wood glue. Use clamps or temporary painter's tape to hold the shell in place until the glue cures, leaving a perfectly smooth surface.
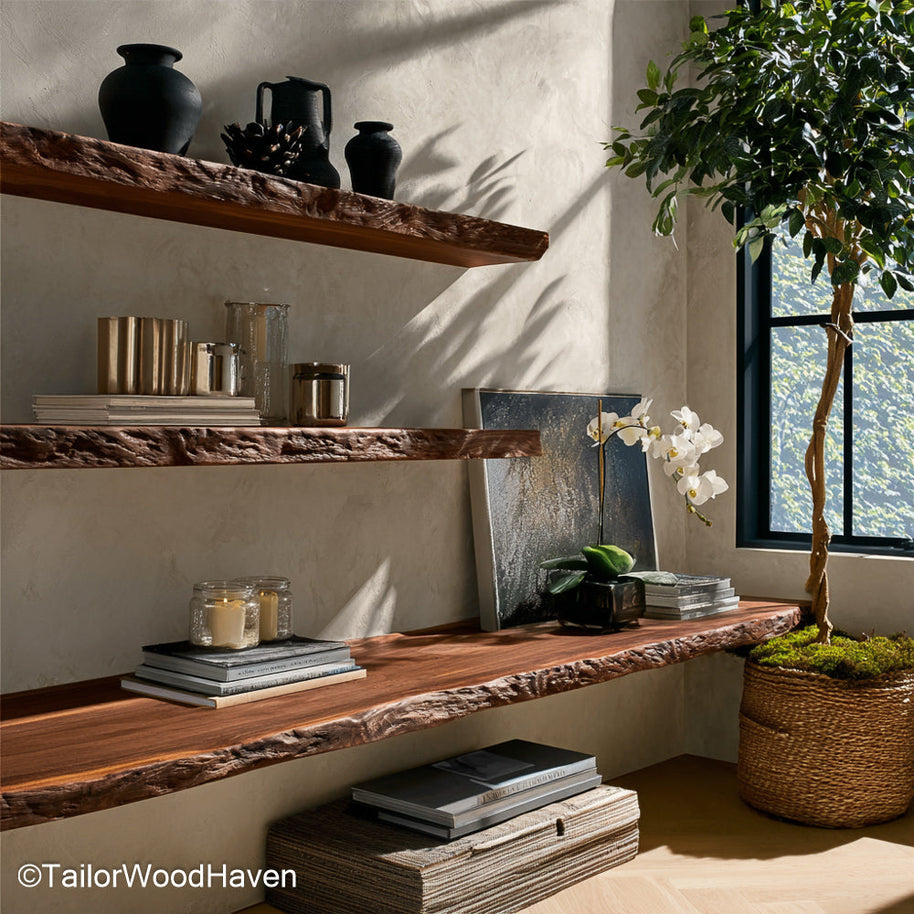
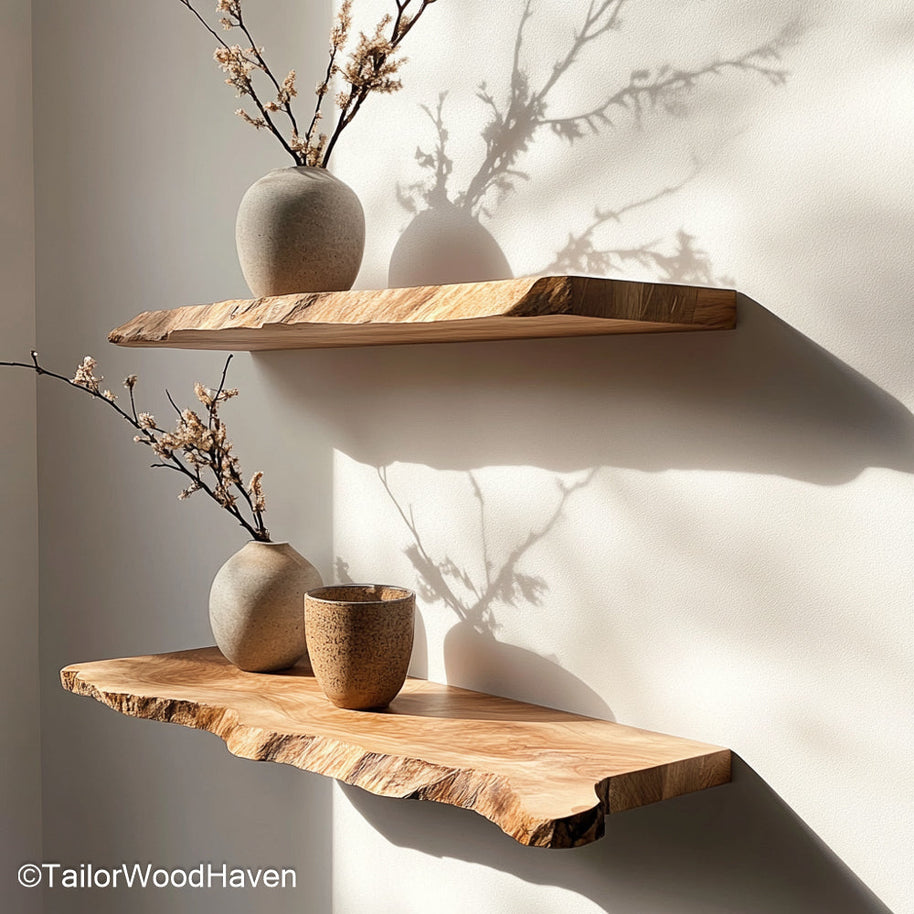
Crafted from solid walnut slabs with natural texture and hidden mounts, these floating shelves are great for stylish open storage across home spaces.
French Cleats
This two-part system involves securing one piece of angled wood to the wall and the matching piece to the back of the shelf.
The shelf simply slides onto the wall piece. This method, popular in wooden floating shelves DIY, is very strong and makes the shelf easy to remove if needed.
Modular Systems
Choose modular metal rail systems that secure the shelf to the wall bracket from underneath using small, hidden screws, ensuring the top surface remains clean and pristine.
Now that you have completed your wooden floating shelves DIY, the final step is styling them to perfection.
The Rule of Three: Group items in odd numbers (3 or 5) for visual balance.
Vary Heights: Use tall objects (vases, books standing up) to anchor the ends and shorter objects in the middle.
Depth and Texture: Layer items - place a small piece of artwork leaning against the wall, with a small vase placed in front of it. Use contrasting textures (smooth glass next to rough wood or metal).
These sealed hardwood 8-inch floating shelves with a minimalist finish and bracket-free design are great for large kitchens or full-room styling.
Visually balance the shelf by distributing colors and masses evenly. Avoid clustering all heavy, dark items on one side.
By mastering this final step, your handcrafted wooden floating shelves DIY project will serve as a beautiful, functional focal point in your home.
A successful wooden floating shelves DIY project is a perfect blend of solid construction and aesthetic detail.
By carefully selecting your solid wood, precisely cutting the bracket channels, and ensuring robust anchoring into wall studs, you create more than just storage; you create a timeless piece of furniture that adds warmth and character to your home.
Enjoy your beautiful, handcrafted shelves!


