Your cart (0)
Your cart is empty
Tax included and shipping calculated at checkout
Recommended products


Drawer menu
Tax included and shipping calculated at checkout


Want a budget-friendly way to elevate your space? Floating shelves offer the ultimate minimalist storage solution, but store-bought options can be pricey and limited in size.
Learning how to make floating wall shelves yourself ensures they perfectly match your style, dimensions, and load requirements.
Before you can truly learn how to make floating wall shelves, gathering the right tools is essential for achieving a precise, strong, and perfectly level result.
Proper preparation is the first step in learning how to make floating wall shelves that look professional.
Concealed Brackets
This is the most critical component. Choose steel rod brackets for solid wood shelves or a metal rail system (French cleat) for hollow-core shelves, depending on your load.
Screws, Brackets, Anchors
Use robust, structural screws rated for wood or metal, depending on your bracket. For wall anchoring, you’ll need heavy-duty toggle bolts for drywall or deep wood screws if you hit a stud.
Wood Boards
Choose solid wood (pine, oak, maple) for high load capacity, or plywood/MDF for lighter, hollow-core construction.
Stud Finder, Level, Drill:
A quality stud finder locates the safest anchoring points. A long level (4 feet recommended) is non-negotiable for ensuring your shelf is perfectly straight. A power drill/driver is needed for drilling pilot holes and driving screws.
Measuring Tools:
Tape measure, pencil, and a speed square (for precise cuts and markings). You'll need these items when learning how to make floating wall shelves with exact dimensions.
Woodworking Tools (for DIY shelf construction):
Miter saw (for cutting wood) and a router or drill press (for routing the channels/holes for the hidden bracket).
The method for how to make floating wall shelves depends entirely on the weight capacity you require. Books, dishes, and plants demand much greater strength than small decorative items.

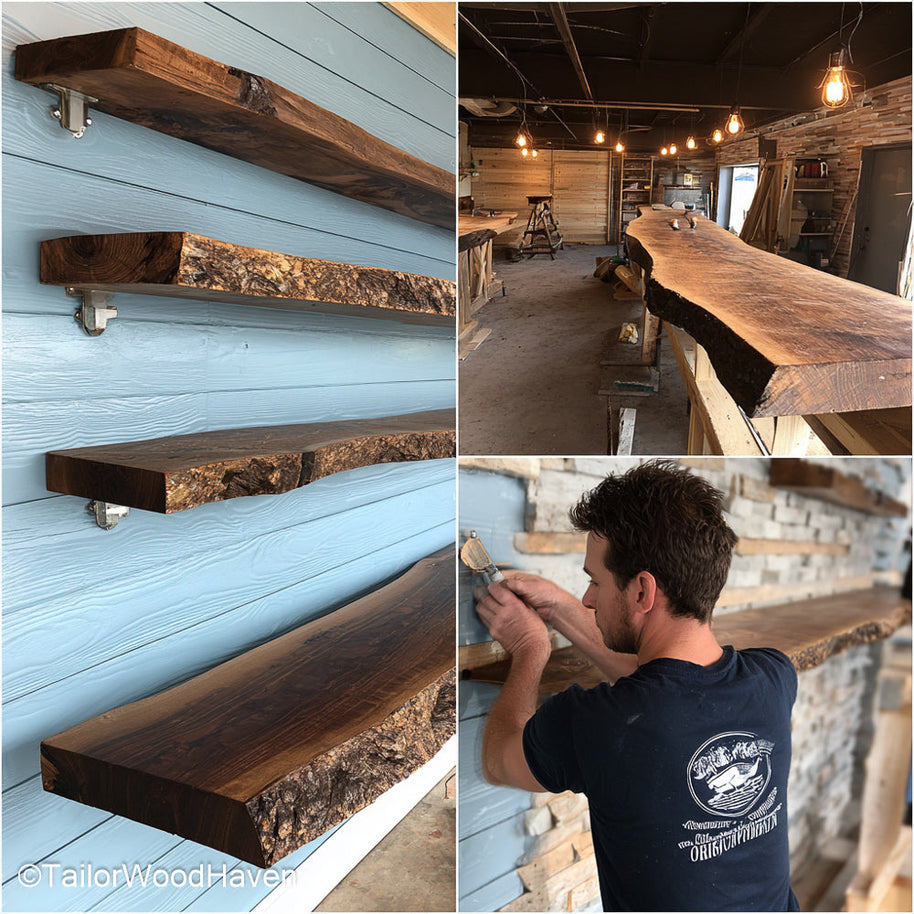
With a 2-inch wood profile, these shelves offer a bold visual presence and ensure extra support, making them perfect for high-traffic areas like kitchens or studios.
Solid Wood (Heavy-Duty)
Use boards that are at least $1.5$ inches thick. This method is the strongest and requires drilling deep, precise holes into the back edge of the wood to accept the steel support rods. If you’re building deep shelves for a lot of weight, this is the superior option.
Hollow-Core (Lightweight Look)
This involves building a box frame out of thin wood (like plywood or MDF) and cladding it with veneer to create a thick, substantial look without the heavy mass of solid wood.
This shell slides over a wooden or metal rail system and is significantly easier to mount, making it a popular answer to how to make floating wall shelves for decorative use.
Cutting:
Measure and cut the wood to your desired length and depth. For a clean look, all cuts must be exactly 90 degrees.
Routing Channels:
This is the most challenging step. If you are using rod brackets, you must drill holes into the back of the shelf that exactly match the spacing, diameter, and depth of the steel rods.Any misalignment will prevent the shelf from sitting flush.
If you're aiming for a full-wall statement piece, you can follow this guide from Chris Loves Julia where they built custom solid wood shelves that span the entire wall.
This shows the advanced approach to how to make floating wall shelves that are truly integrated.
Spending extra time on this phase ensures the shelf is protected, beautiful, and the quality finish truly elevates the look of your DIY project. This is the last step in answering how to make floating wall shelves before installation.
Sanding
Sand the wood thoroughly, moving from rough-grit to fine-grit sandpaper ($80$ to $220$). A smooth finish is essential for a high-quality look.
Sealing
Apply stain, paint, or a protective polyurethane topcoat. Ensure the finish is fully cured before mounting the shelf to the wall. This completes the construction phase of how to make floating wall shelves.
A crooked floating shelf completely ruins the illusion and the clean aesthetic. Precision in this phase is more important than in any other part of learning how to make floating wall shelves.
This comprehensive set provides the brackets, anchors, and instructions necessary to securely install any solid wood shelf, ensuring maximum stability.
Transfer the Bracket:
Hold the bracket up to the wall at the desired height. Use your long level to ensure the bracket is perfectly horizontal.
Mark Studs:
Mark the wall exactly where the screw holes align with any detected studs. If a stud isn't available, mark for your heavy-duty anchors.
Drill Pilot Holes:
Drill pilot holes. The size of the pilot hole should be slightly smaller than the thickness of your screw to ensure a tight, secure grip. This crucial preparatory step is often overlooked when learning how to make floating wall shelves.
As you drive in the first screw (ideally into a stud), use the level again to ensure the bracket hasn't moved.
Continue checking the level as you drive the remaining screws and anchors. The metal bracket must be perfectly level and secured flush against the wall.
If you are installing a stack of shelves, use a piece of paper or cardboard cut to the exact desired spacing height.
Use this template to quickly and accurately mark the height of the next shelf bracket, ensuring consistent visual spacing.
This attention to detail is key to mastering how to make floating wall shelves look cohesive and professional.
For renters or those seeking a temporary display, avoiding drill holes is a priority. This method is significantly easier, but severely limits the amount of weight the shelf can hold. It's an alternative path to learning how to make floating wall shelves.
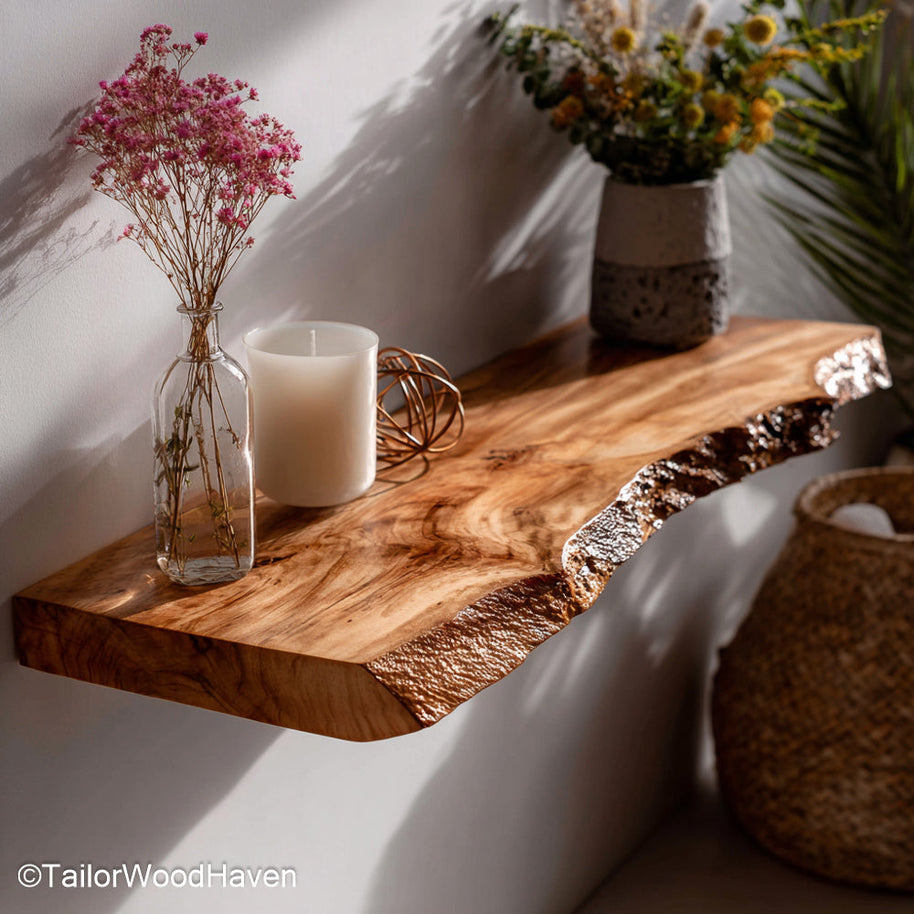
Featuring raw wood texture and organic edges, these shelves offer a nature-inspired look perfect for adding rustic accents to living rooms or hallways.
For renters or those seeking a temporary display, avoiding drill holes is a primary concern. While these methods compromise load capacity, they offer a viable solution for lightweight décor.
Adhesive Mounts:
These use heavy-duty wall adhesive strips (like Command Strips) or commercial-grade construction adhesive tape to hold very lightweight shelves. They are only suitable for small items like spice jars or light décor.
Tension Brackets:
While not truly "floating," tension rod systems (often used in shower stalls) can be adapted to hold small shelves by clamping between two opposing walls. This works best in narrow alcoves or window frames.
For a super quick and damage-free solution,The Ruthless Maker shares a clever 2-minute DIY shelf trick that works great in small spaces. This illustrates a clever approach to how to make floating wall shelves that bypass drilling entirely.
Remember, any method that avoids anchoring into wall studs carries a significantly reduced weight capacity.
These solutions are best reserved for temporary installations or for displaying lightweight art and collectibles. Never rely on adhesive for heavy books or valuable items.
The structural integrity of a solid shelf system, built using the guide for how to make floating wall shelves above, will always be superior.
The hallmark of a high-quality floating shelf is its seamless, flush connection to the wall. Mastering these final steps separates a DIY project from a professional installation.
Tight Fit
The shelf must slide tightly onto the hidden bracket rods. If the routed holes are too large, the shelf might sag or wobble slightly.
You can use shims (small pieces of thin wood or plastic) between the shelf back and the wall to eliminate any gaps.
Hidden Brackets
Once the shelf is mounted, absolutely none of the support hardware should be visible. If you can see the metal bracket from below, the routing was too shallow or the shelf is sagging.
This failure means you haven't mastered how to make floating wall shelves look truly seamless.
If you use a shelf system that requires screws to secure the shelf to the bracket from underneath (a common safety feature), use screws that match the shelf's finish.
For instance, use black-coated screws for a dark walnut shelf to minimize their visibility. Always countersink these screws so they sit flush with the wood surface. Knowing these finishing details is the final part of learning how to make floating wall shelves.
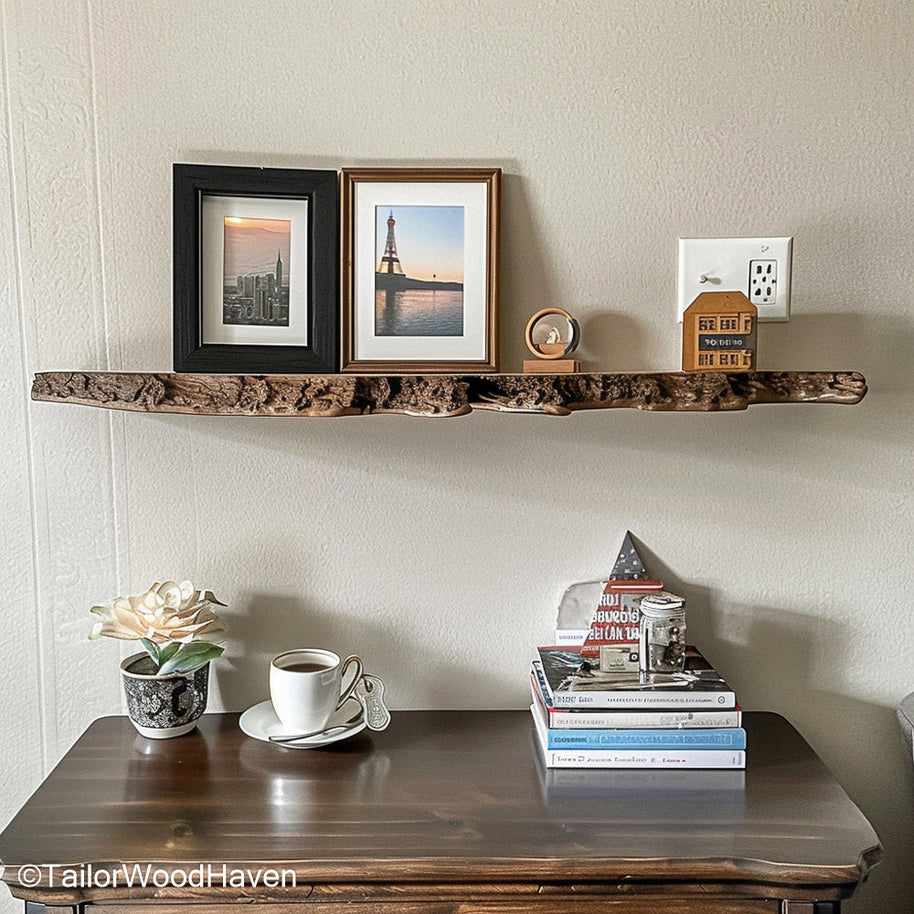
Made from rich walnut with visible grain and a slim floating form, these shelves are an elegant choice for both minimalist and modern farmhouse interiors.
Learning how to make floating wall shelves is a rewarding project that allows you to customize your home storage without paying designer prices.
The success of your shelves hinges on choosing the right construction method (solid vs. hollow-core), using appropriate heavy-duty brackets, and being meticulous with your level and anchor placement.
By prioritizing these structural details, you can be confident that your custom-built floating shelves are strong, stylish, and flawlessly flush against your wall.


