Your cart (0)
Your cart is empty
Tax included and shipping calculated at checkout
Recommended products


Drawer menu
Tax included and shipping calculated at checkout


Thinking about how make floating shelves for your apartment or small room? You don't need a workshop full of power tools.
This guide shows you how make floating shelves at home with minimal effort, using simple materials and smart techniques, even without a power drill.
The key to a simple, successful DIY project is minimizing the complexity of your materials. When figuring out how make floating shelves easily, start with components that require little to no modification, saving you time and frustration.
Ledge Shelves
The absolute easiest route is buying pre-cut, pre-finished picture ledges or narrow display shelves. Look for lightweight materials like thin plywood or MDF. These shelves are designed for quick mounting and often come with basic hardware already included.
Alternative
If you need a specific length or finish, simply use common lumber like a 1x4 or 1x6 pine board. You can have these cut to the perfect length right at your local hardware store.
Pine is light, inexpensive, and easy to paint or stain, making it an excellent, budget-friendly option when learning how make floating shelves.
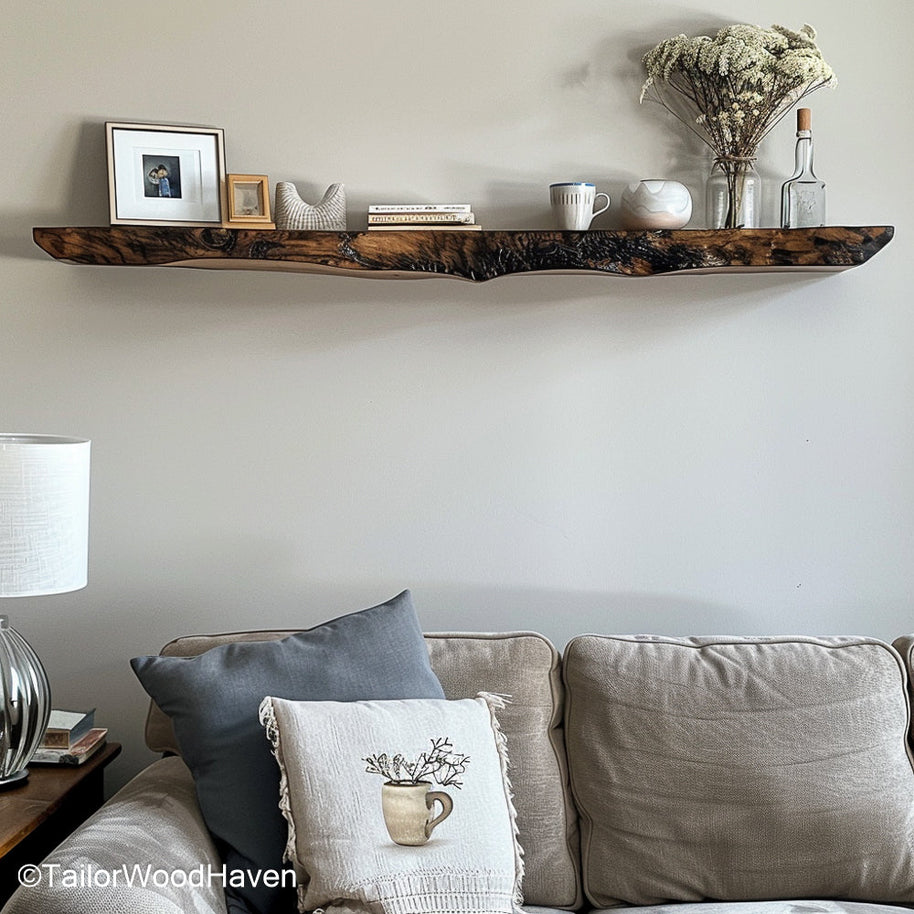
t's very easy to make floating bar shelves like these, which are perfect for stylish bottle displays in home bar walls or dining area setups.
The hardware you choose dictates the shelf's final weight limit.
For Drilling (Light Loads)
If you have a drill, buy basic plastic drywall anchors and screws. These are suitable only for light loads (5-10 lbs max) and small décor.
No-Drill/Minimal Damage
To master how make floating shelves in a rental, stock up on heavy-duty, removable adhesive strips (like Command Strips) or commercial-grade mounting tape.
These are essential if you want a minimal-damage solution that is apartment-friendly. Remember, the weight capacity here is extremely low.
Tools
A measuring tape and pencil are necessary for alignment. Accuracy is crucial for the "floating" illusion.
Level (Critical)
While a large level is best, you can use a small 6-inch torpedo level, or even a smartphone level app, to ensure your shelf is straight.
A crooked shelf ruins the illusion and defeats the purpose of learning how make floating shelves that look clean and modern.
Adhesive
Keep some strong construction adhesive or wood glue on hand, especially if you opt for the no-drill method, to ensure your lightweight components stay firmly attached.
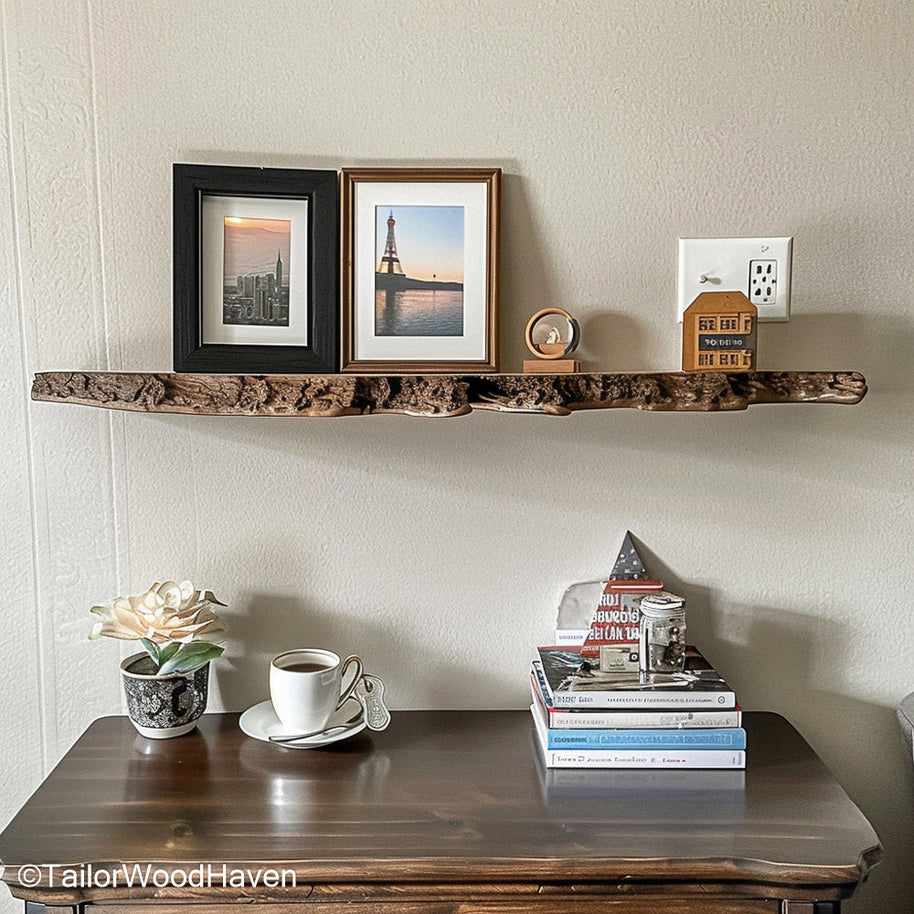
A mini shelf idea for your bathroom, why not? Tailor Wood Haven thinks it's really cute - these sealed wood floating shelves are perfect for holding essentials.
This method uses lightweight, pre-made ledge shelving and focuses entirely on fast, precise installation. This is the fastest answer to how make floating shelves for quick decorating projects.
Choose a location that does not require heavy storage. Areas above a desk, a small stretch of wall in a bathroom, or a narrow hallway are ideal. Remember, this 30-minute method is for light display only.
Hold and Position: Hold your chosen pre-cut shelf or bracket (if separate) up to the wall at the desired height.
Use the Level: Place your level on top of the shelf/bracket and adjust until the bubble is perfectly centered.
Mark Points: Use a pencil to mark the exact location where your screws or adhesive strips will land. Take your time here - precision ensures the finished shelf looks high-end.
If using a lightweight shelf that requires anchors:
Drill and Insert: Drill the small pilot holes, tap the plastic anchors into the wall, and secure the shelf bracket with screws.
Attach Shelf: If the shelf and bracket are separate, slide the shelf onto the mounted bracket.
Inspired by The Ruthless Maker’s approach, this section is perfect if you’re tight on time and need something quick and effective. Knowing how make floating shelves quickly is all about minimizing hardware complexity.
This section focuses on ingenious hacks for those who absolutely cannot use a drill or prefer maximum simplicity. You can still learn how make floating shelves that are secure enough for light items.
This is the ultimate renter-friendly method for how make floating shelves.
Preparation: Clean the wall surface thoroughly with rubbing alcohol and let it dry. This is crucial for adhesive grip.
Application: Apply 3-4 pairs of heavy-duty adhesive strips (like Command Picture Hanging Strips or commercial mounting tape) to the back of a very lightweight wood or plastic shelf.
Mounting: Press the shelf firmly against the wall for 30 seconds.
Weight Check: Never exceed 5 pounds of total weight. This method is strictly for displaying small items like succulents, photos, or spice jars.
When you look for kits that answer how make floating shelves, look for options where the shelf board is already attached to a small, simple metal bracket.
These systems usually require only 2-3 small screws, reducing the number of holes you need to drill and speeding up the process considerably.
Tension Rods
Use a spring-loaded tension rod (like those used for curtains) in a narrow alcove. You can place a thin piece of wood or plastic on top of the rod to create a small, "floating" display surface without drilling any holes.
Corner Shelves
Small, lightweight corner shelves often use simple L-brackets that require minimal anchoring, making them easier to patch upon move-out.
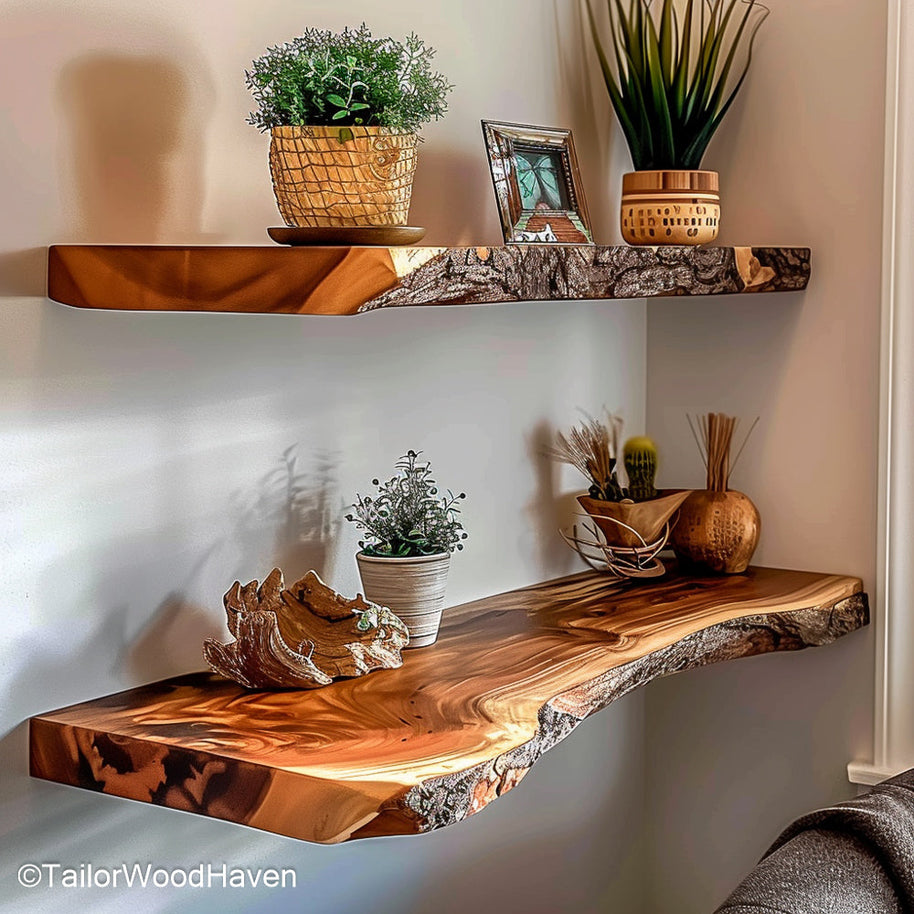
These shelves offer a nature-inspired look with raw wood texture and organic edges, perfect for accents in living rooms or hallways.
This method uses lightweight, pre-made ledge shelving and focuses entirely on fast, precise installation. This is the fastest answer to how make floating shelves for quick decorating projects.
Choose a location that does not require heavy storage. Areas above a desk, a small stretch of wall in a bathroom, or a narrow hallway are ideal.
Remember, this 30-minute method is for light display only, reducing the structural complexity required for how make floating shelves.
Precision in this step is what separates a professional-looking shelf from one that looks visibly crooked. The entire illusion of the "floating" shelf relies on it being perfectly straight.
Hold and Position
Hold your chosen pre-cut shelf or bracket (if separate) up to the wall at the desired height. If you're building multiple shelves, use a tape measure to ensure the top and bottom shelves have consistent spacing from the ceiling or floor.
Use the Level
Place your level on top of the shelf or bracket and adjust it slowly until the bubble is perfectly centered. Do not rush this - a straight line is crucial.
Mark Points
Use a pencil to mark the exact location where your screws or adhesive strips will land. If you're wondering how make floating shelves look high-end, the answer is simple: precision.
Take your time here; accurate marking ensures the finished shelf sits flush and perfectly level, making the minimal effort pay off visually.
If using a lightweight shelf that requires anchors:
Drill and Insert: Drill the small pilot holes, tap the plastic anchors into the wall, and secure the shelf bracket with screws.
Attach Shelf: If the shelf and bracket are separate, slide the shelf onto the mounted bracket.
Inspired by The Ruthless Maker’s approach, this section is perfect if you’re tight on time and need something quick and effective. Knowing how make floating shelves quickly is all about minimizing hardware complexity.
Even simple, lightweight shelves can offer significant utility if styled correctly and reinforced with basic, minimal hardware.
The beauty of learning how make floating shelves easily is that they force a minimalist approach to styling.
Curate: Only display 3-5 items per shelf. Less is more.
Vertical Focus: Use items of varying heights to create visual interest.
Weight Distribution: Keep the heaviest items closest to the wall and centered over the strongest part of the bracket or adhesive. This simple trick improves stability dramatically.
If you used plastic anchors or the 30-minute adhesive method, your total capacity is very low.
Testing
Always test the shelf before fully loading it. Gently push down near the front edge. If you see or hear the drywall flexing, the shelf is overloaded.
Upgrade Hardware
If you find you need more capacity, you must upgrade your hardware. This involves going back and finding the studs or installing heavy-duty anchors.
For a more detailed, polished finish using solid wood and robust construction, check out Chris Loves Julia's process for inspiration. They mastered how make floating shelves that can handle substantial weight.
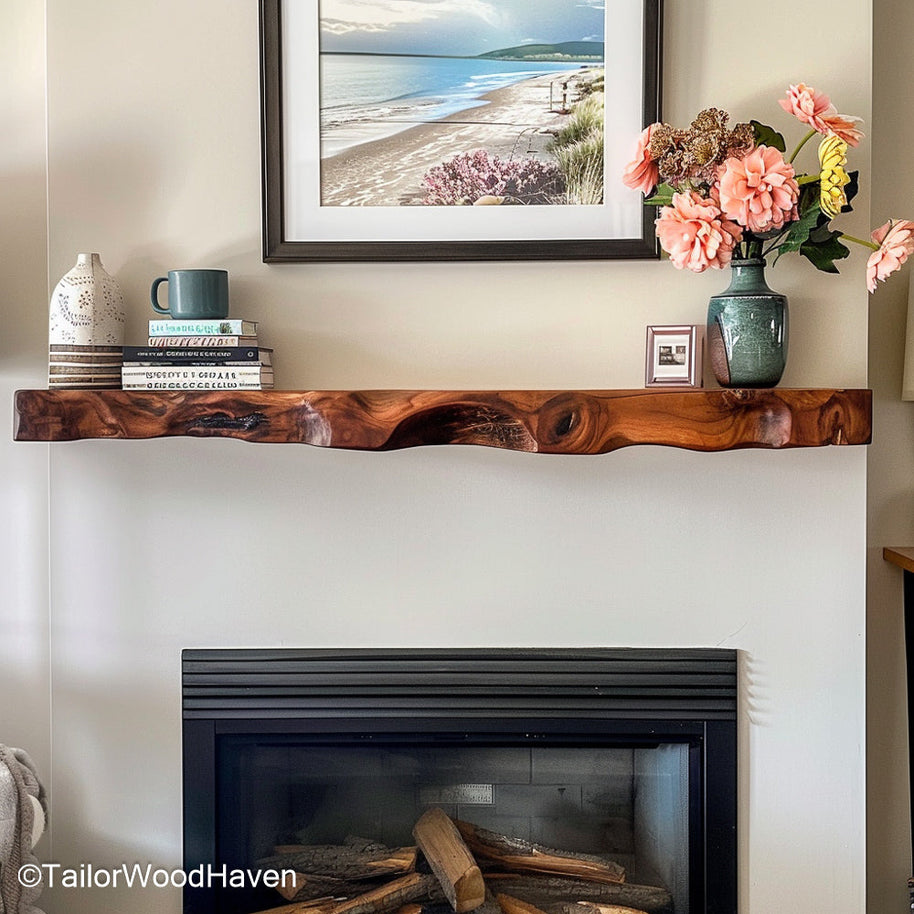
These floating shelves are crafted from a thick wood slab with live edge styling, and are specifically designed to be installed as a stunning mantel above a fireplace.
Learning how make floating shelves doesn't require complex carpentry skills or expensive equipment.
Whether you opt for the 30-minute speed method, choose a no-drill adhesive hack, or decide to tackle a simple anchored solution, success lies in selecting lightweight materials and prioritizing precise leveling.
By following this beginner-friendly guide, you can confidently add sleek, custom storage to your home.


