Your cart (0)
Your cart is empty
Tax included and shipping calculated at checkout
Recommended products


Drawer menu
Tax included and shipping calculated at checkout


Want to add timeless elegance to your home? Learning how to make floating wood shelves allows you to install solid wood floating shelves that look and feel expensive.
The foundation of a premium floating shelf is the wood itself. Your choice impacts the shelf's appearance, longevity, weight, and ultimately, the success of your project, learning how to make floating wood shelves.
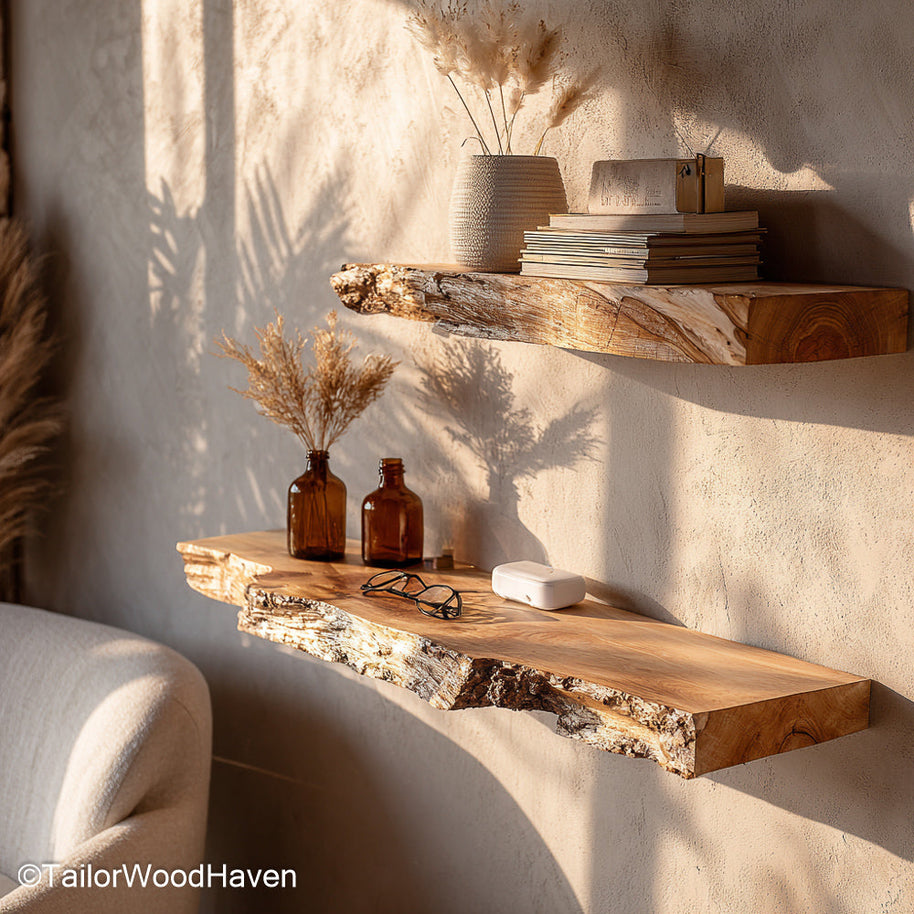
Made from American walnut with a smooth surface, this shelf's soft, modern floating design is perfect for minimalist and contemporary room styling.
Solid Wood (Recommended)
This is the superior choice for learning how to make floating wood shelves. It provides maximum strength, resists warping better over time, and can be sanded and refinished multiple times. It is heavier and requires more robust mounting hardware.
Engineered Wood (Plywood or MDF)
Only use high-grade plywood to create a hollow-core shelf if you need the thickness without the weight.
MDF should generally be avoided for floating shelves due to its lack of load-bearing ability and poor resistance to moisture.
|
Wood Type |
Pros |
Cons |
Ideal Style |
|
White Oak |
Extremely durable, prominent grain, excellent strength. |
High cost, very heavy, difficult to cut. |
Modern, Traditional, High-End Farmhouse |
|
Pine |
Very affordable, lightweight, easy to work with. |
Soft, easily dented, with less structural strength. |
Rustic, Budget DIY, Staining required. |
|
Walnut |
Rich, deep color, beautiful natural grain, luxury look. |
Very expensive, often sold in smaller slabs. |
Mid-Century Modern, Elegant, Minimalist |
When deciding how to make floating wood shelves, consider reclaimed or salvaged wood. This material provides instant character and a rustic look while being environmentally friendly. Just ensure the reclaimed wood is free of significant rot or pest damage before use.
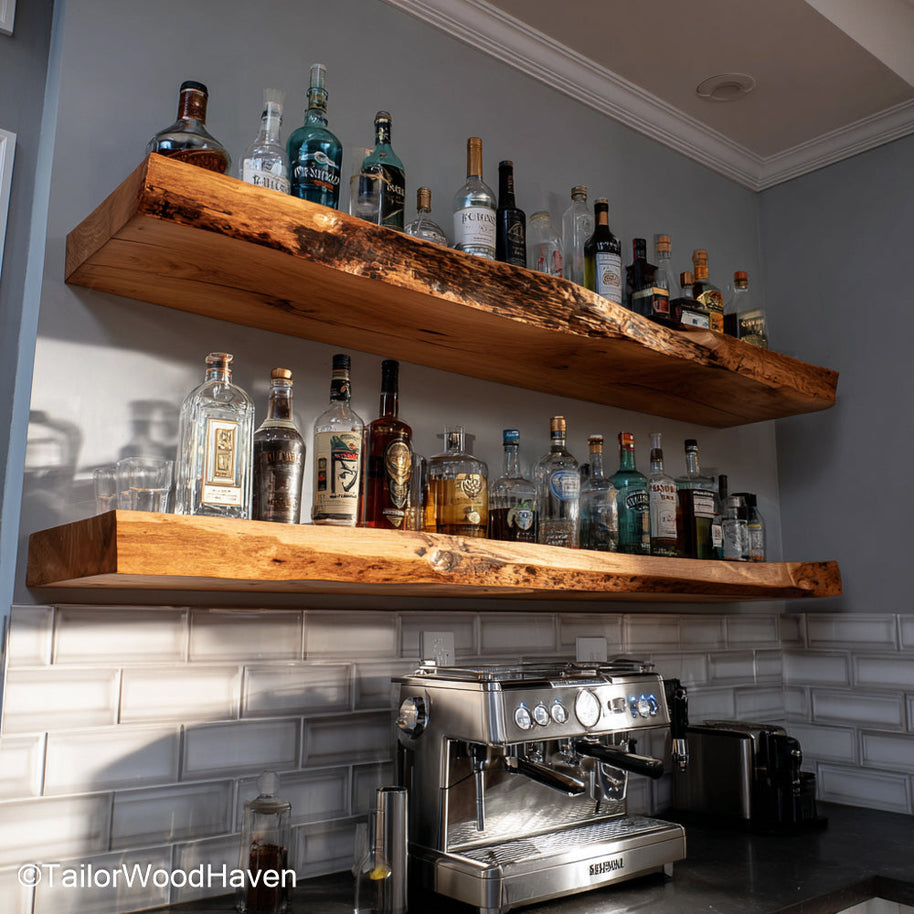
Crafted from rich walnut with natural grain, these bracket-free shelves are ideal for adding warmth and sophisticated storage to kitchens or living rooms.
Building a shelf from a solid slab requires precision, especially when routing the channels for the hidden brackets. This method guarantees a high-end finish and maximum weight capacity.
Cut Accurately
Use a miter saw to cut your selected wood board to the precise desired length. The cut must be perfectly square to ensure the shelf sits flush against the wall.
Edge Preparation
If you want a live edge (natural, un-milled edge), you only need to clean and seal the raw bark. For a traditional look, square off all edges.
Sanding
Sanding is critical for a premium feel. Start with 80-grit sandpaper to remove any deep imperfections, move to 120-grit, and finish with 220-grit for a buttery-smooth surface.
Staining
If coloring the wood, apply a wood conditioner first (especially to soft woods like pine) to ensure the stain absorbs evenly. Apply the stain and wipe off the excess after the recommended time.
Sealing
For longevity and protection against moisture (essential for kitchens and bathrooms), apply at least two coats of a protective sealant, such as polyurethane or an oil-based finish. Follow the manufacturer’s instructions for cure time before installation.
One of the best examples of using solid wood beautifully is from Chris Loves Julia’s DIY shelf project, which combines form and function seamlessly, offering a perfect model for how to make floating wood shelves that anchor a room.
This is the make-or-break step in learning how to make floating wood shelves. The holes for the hidden steel rods must be perfectly straight and sized.
Measure:
Mark the exact location of the holes on the back edge of your shelf board, matching the spacing and diameter of your hidden steel brackets.
Drill/Route
Use a drill press (preferred for accuracy) or a powerful handheld drill with a spade or auger bit to drill the holes.
The depth must be sufficient to hide the rods, and the holes must be perfectly straight to avoid the shelf tilting.
The installation process for a heavy wooden shelf must prioritize structural integrity to safely support the shelf’s weight plus the load of your items. The question of how to make floating wood shelves functional is primarily answered here.
Locate Studs
Use a reliable stud finder to locate and mark the center of any wall studs along the line where the shelf will be mounted.
Anchoring into studs is always the strongest and safest option, essential for mastering how to make floating wood shelves.
Level and Mark
Hold the metal mounting bracket up to the wall, use a long level (4-foot minimum) to ensure it is perfectly horizontal, and mark the screw placement.
Because solid wood shelves are significantly heavy on their own, the anchors must be exceptionally strong.

Built from rich walnut slabs with a soft finish, these floating shelves are versatile and ideal for adding a touch of elegance to kitchens, bedrooms, or workspace walls.
Stud Mounting (Best)
Use heavy-gauge construction screws (3-inch minimum) to drive the bracket directly into the wood studs.
Drywall Mounting (Alternative)
If hitting studs is impossible, you must use high-capacity fasteners like toggle bolts or snap toggles.
These anchors distribute the weight across a wider area behind the drywall, vastly increasing the weight capacity compared to simple plastic anchors.
Never try to mount a solid wood shelf into drywall using lightweight anchors.
The magic of how to make floating wood shelves work is the hidden bracket.
Once the metal bracket is perfectly secured and level on the wall, the shelf simply slides onto the steel rods or cleat system, concealing all the hardware and creating the "floating" illusion.
Ensure the shelf fits snugly; you want a friction fit without having to force it, ensuring a premium, finished look.
While solid wood shelves demand professional anchoring, there are alternative methods for achieving a floating look with lightweight décor pieces that satisfy the need to know how to make floating wood shelves for renters or temporary spaces.
This method is semi-permanent and suitable only for very lightweight, short shelves in non-high-traffic areas.
Mount a Cleat
Screw a thin wooden cleat (a 1x2 piece of lumber) securely into two studs. This cleat will take the shear load.
Glue the Shell
Construct a hollow box shelf and glue it over the cleat, securing the shelf to the wall with small finish nails only until the wood glue cures.
Adhesive Supports
For a lightweight, damage-free alternative, you can use specialized high-strength adhesive mounting pads.
These are suitable only for small display ledges and should not exceed 5 pounds. Looking for a faster approach?
The Ruthless Maker offers a minimalist solution that skips complicated tools but still looks polished. This shows an excellent approach to how to make floating wood shelves for a light display.
Using commercial-grade adhesive strips (rated for high weight) can hold small picture ledges.
Always adhere strictly to the weight limits listed on the adhesive product; overloading these can severely damage your wall finish upon removal.
This method is the simplest answer to how to make floating wood shelves without drilling.
If your goal is functional storage for books, pottery, or appliances, you must build for strength.
The robust construction ensures your shelves will last a lifetime, continuing the question: how to make floating wood shelves strong?
Steel Rod Gauge
Choose brackets made from thick, high-gauge steel (at least 1/4 inch thick). The diameter of the steel rods should be substantial (at least 5/8 inch).
Thin metal rods will eventually bend under the torque created by heavy objects placed far from the wall.
Bracket Length
The bracket should ideally span two or three wall studs. The more points of contact with the wall structure, the greater the load capacity.
This is the key to mastering how to make floating wood shelves for storage.
Thickness
The shelf itself should be at least 1.5 inches thick to provide enough material to accept the large steel rods and to prevent the shelf material from flexing or warping under weight.
When designing how to make floating wood shelves, prioritize thickness over everything else if strength is the primary goal.
Reinforcement
For shelves deeper than 10 inches, consider internal reinforcement. Some high-end bracket systems use a hidden truss or support bar that runs lengthwise inside the shelf body, which dramatically increases the shelf’s ability to resist downward pressure.
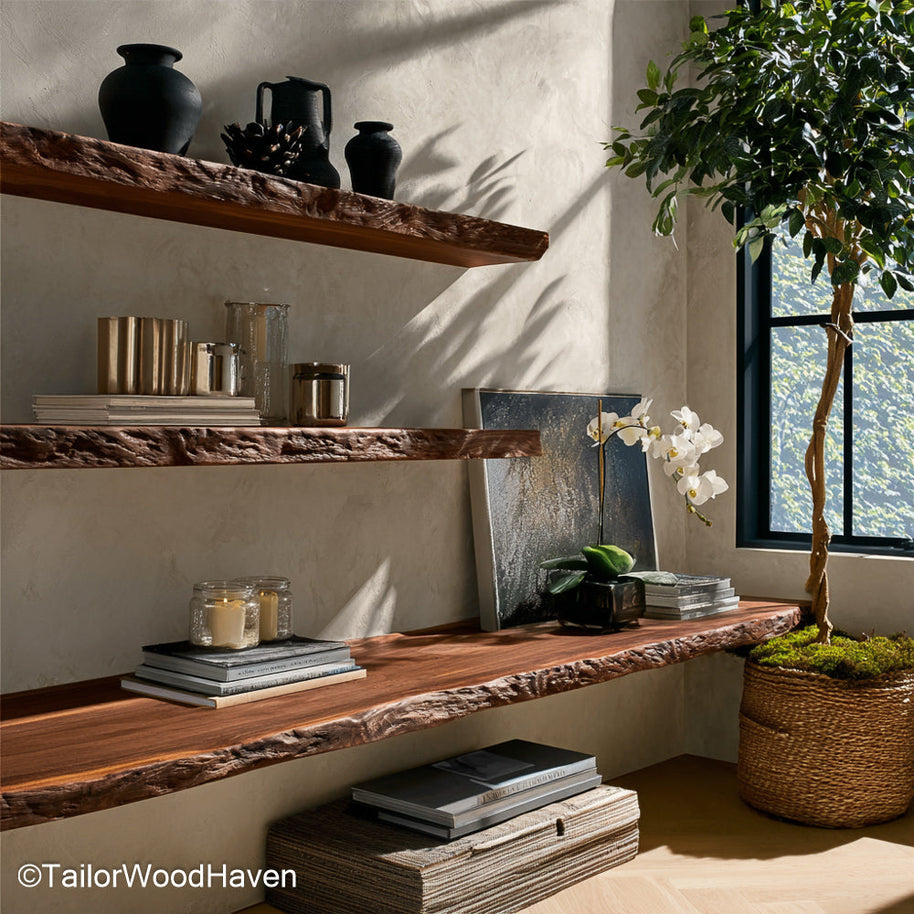
Built from solid walnut slabs with a natural texture and hidden mounts, these shelves provide stylish open storage across various home spaces.
Mastering how to make floating wood shelves is a project that offers immense reward, delivering custom, premium-quality storage solutions to your home.
The key to success lies in two steps: choosing high-quality solid wood for durability and beauty, and rigorously adhering to structural anchoring techniques by finding wall studs.
By prioritizing strength in your build, your handcrafted floating shelves will remain perfectly level and flawlessly elegant for years to come.


