Ever wondered how to make sturdy floating shelves that won’t sag over time? This guide walks you through choosing the right materials, building strong brackets, and mounting shelves that can handle serious weight - perfect for DIY enthusiasts aiming for both style and strength.
Understanding What Makes Floating Shelves Sturdy
Have you ever installed a beautiful set of floating shelves, only to watch them sag under the weight of a few books or décor pieces? It’s frustrating - especially when you’ve spent time and money creating something meant to last. Learning how to make sturdy floating shelves isn’t just about building them; it’s about understanding what gives them strength.
Floating shelves are “floating” because they hide their brackets inside the wood. That sleek, bracket-free look is what makes them popular. But it’s also what makes them vulnerable if you don’t use the right materials and support. The key to sturdy shelves lies in three factors: solid materials, strong brackets, and proper installation.
If you’re trying to figure out how to make sturdy floating shelves that can handle heavy loads without sagging, focus on the hidden structure. Reinforced brackets and high-quality hardwood can completely change how long your shelves last. Understanding this balance between design and strength is the real secret to success.
If you want inspiration for real wood options that combine durability and aesthetics, check out these real wood floating shelves - they’re great examples of how craftsmanship and structure can create lasting quality.
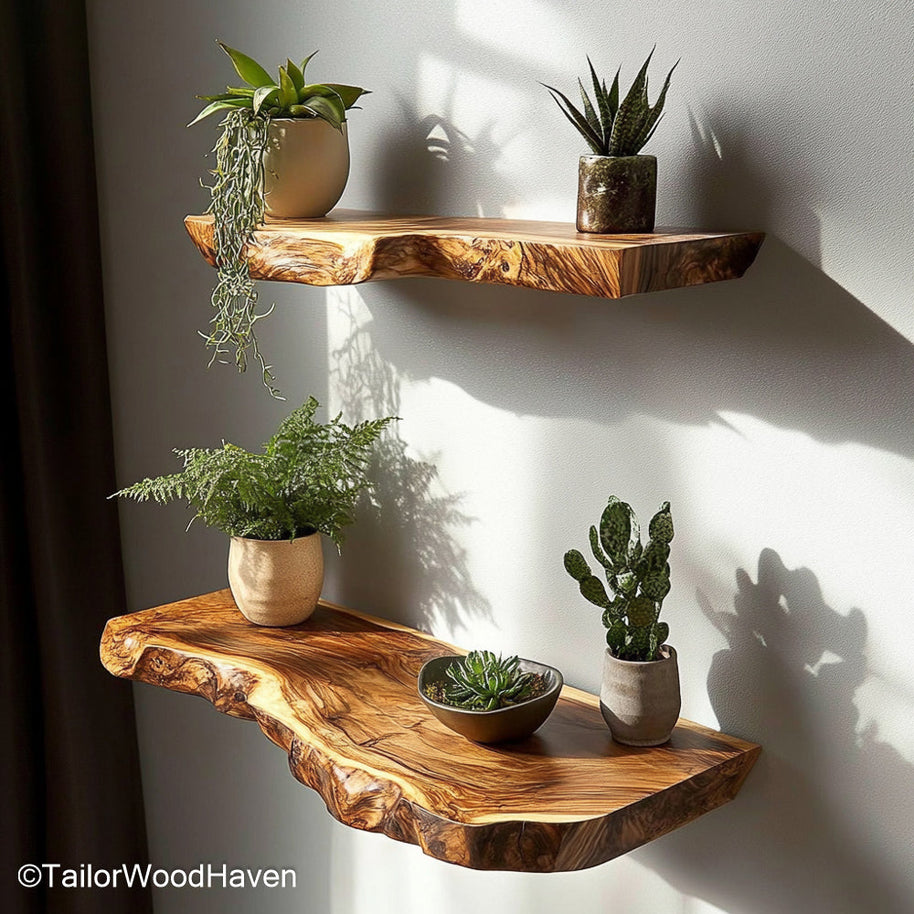
Choosing the Right Materials for Durable Floating Shelves
Before picking up a single tool, you’ll need to choose materials that can handle the weight and stress of everyday use. This is the foundation of how to make sturdy floating shelves that last for years.
The best woods for strength and stability are hardwoods like oak, maple, or walnut. These species resist warping and provide the dense structure needed to support heavier items. Plywood can work for lighter loads, but if you’re building for long-term use, solid hardwood is your best investment.
Pay attention to thickness - at least 1.5 inches is ideal. Thin boards may bend over time, especially if you plan to display books, plants, or ceramics. Combine your wood with heavy-duty metal brackets and wall studs for maximum strength.
When you’re learning how to make sturdy floating shelves, remember that the quality of your materials determines 80% of the final strength. Cheap or soft woods might look fine at first, but they often sag or split after a few months. Investing in solid hardwood means you’ll only have to build them once - not fix them later.
Want an option that blends rustic beauty with reliability? Try hardwood floating shelves - they’re handcrafted from solid slabs, offering both charm and sturdiness.

Step-by-Step Guide on How to Build Heavy-Duty Floating Shelves
Now that your materials are ready, let’s build! This step-by-step process will show you how to make sturdy floating shelves that look beautiful and stay strong for years to come.
Step 1: Measure and Plan
Decide where you want the shelves. Use a tape measure to determine length, width, and spacing. Always plan for the items you’ll place on them - books require more depth than décor pieces. Careful planning is the first step in how to make sturdy floating shelves that don’t just look good but function perfectly.
Step 2: Cut the Wood
Cut your hardwood pieces to the desired size using a circular saw. Double-check each cut for accuracy. Uneven boards can lead to unbalanced shelves later.
Step 3: Drill Pilot Holes
Pilot holes prevent the wood from splitting and make screw placement easier. Mark where your hidden brackets will go and drill holes accordingly.
Step 4: Assemble the Shelf Box
For a hollow shelf design, create a three-sided box using your cut pieces and attach them with wood glue and screws. Make sure the seams are tight and square - strong assembly is the backbone of how to make sturdy floating shelves that won’t loosen over time.
Step 5: Sand and Finish
Use fine-grit sandpaper to smooth the surface. Apply stain or paint, then seal with polyurethane or oil for protection. The finishing process not only adds beauty but also contributes to durability - an essential part of how to make sturdy floating shelves that can withstand moisture and wear.
If you want to see detailed plans and visual diagrams for inspiration, visit DIY Floating Shelf Plans. These resources are perfect if you’re still learning how to make sturdy floating shelves and want extra guidance on precise dimensions and bracket placements.
Once your shelves are finished, it’s time for the most critical part - mounting them securely on the wall.
How to Mount Floating Shelves for Maximum Strength
Even the best-built shelves will fail if installed incorrectly. Mounting is where sturdiness is truly tested, so this step is essential if you want to master how to make sturdy floating shelves that can hold serious weight.
Step 1: Find Wall Studs
Use a stud finder to locate solid points behind your drywall. Shelves attached to studs can hold several times more weight than those fixed with anchors alone. This is a key principle in how to make sturdy floating shelves - always rely on the wall’s structural support, not just drywall.
Step 2: Align and Level
Mark the height and alignment using a pencil and a spirit level. Ensuring your shelf is perfectly level prevents uneven stress on brackets.
Step 3: Attach Brackets
Drill screws through the bracket holes directly into the studs. Make sure each bracket is tight and doesn’t wobble. A secure installation is one of the biggest factors in how to make sturdy floating shelves that last through years of use.
Step 4: Slide on the Shelf
Carefully slide your shelf over the installed brackets. Secure with screws underneath if necessary.
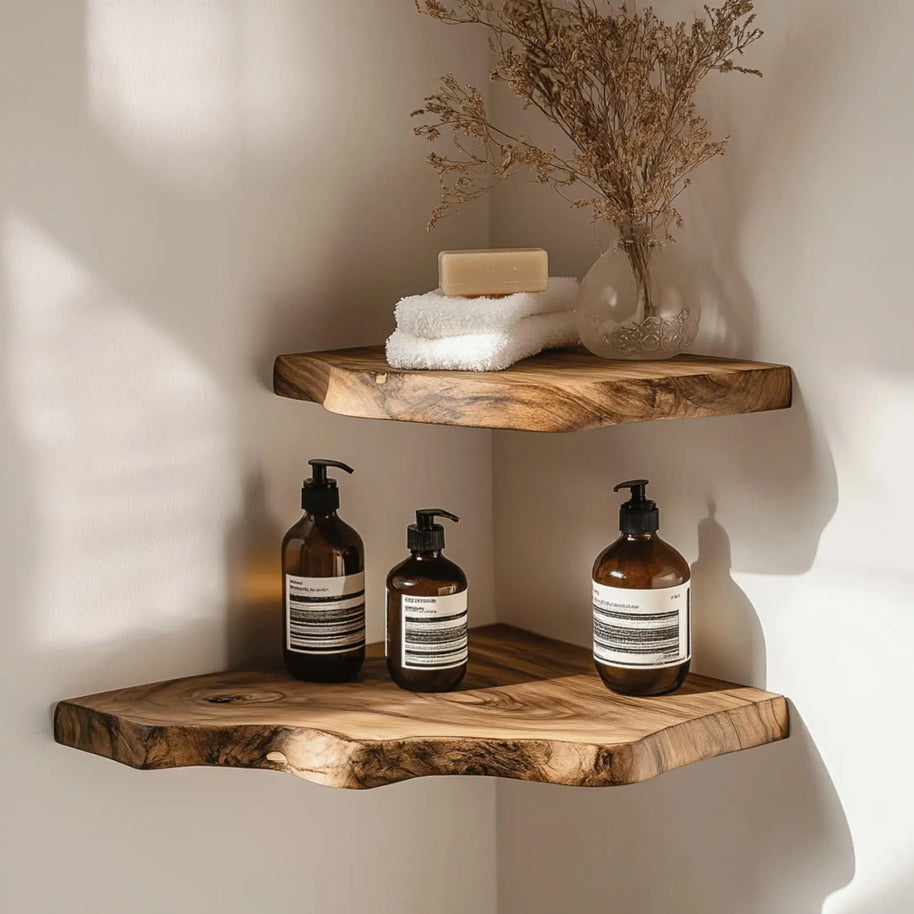
For a natural yet strong wall addition, check out this corner floating shelf set. It’s a perfect example of how craftsmanship and proper installation come together to demonstrate how to make sturdy floating shelves with both form and function.
How to Make Your Own Shelf Brackets
If you love DIY metalwork or want to save some cost, making your own shelf brackets is a fun and rewarding option. It’s also an essential step if you want full control over how to make sturdy floating shelves that can handle weight without sagging.
You’ll need:
-
½-inch steel rods
-
Screws
-
Drill and metal bit
-
Measuring tape
-
Vice and hammer
How to do it:
-
Cut the rods to your desired bracket length.
-
Bend them at a 90° angle using a vice.
-
Drill pilot holes in the wall where each rod will sit.
-
Secure the rods firmly into wall studs.
Custom brackets allow you to adjust strength and fit based on your shelf design. They’re a great way to personalize your project while keeping things sturdy. When learning how to make sturdy floating shelves, mastering bracket design gives you an advantage - your shelves won’t just look custom-made; they’ll perform like professional installations.
How to Hang Floating Shelves So They’re Perfectly Level
You’ve built your shelves - now it’s time to hang them properly. Leveling is critical for both aesthetics and stability.
Start by marking the exact height you want. Use masking tape as a temporary guide to visualize placement. Hold your shelf up and place the level on top - if the bubble stays in the center, you’re good to go.
If your shelf tilts even slightly, redistribute the screws or adjust bracket positions before tightening. Once secure, add your décor.
For spaces like small kitchens or reading nooks, handmade shelving such as these handmade corner shelves can perfectly fit uneven walls while staying strong and stable.

Finishing Touches for a Stylish and Sturdy Look
You’ve mastered how to make sturdy floating shelves, but the final appearance matters too. A smooth finish not only adds elegance but also protects the wood from wear.
Sand the surface again after installation to remove any scratches. Apply a finishing oil, varnish, or lacquer to seal the wood and bring out its natural grain. For a rustic look, a matte finish works beautifully; for modern spaces, go with glossy.
Decorate with plants, books, candles, or picture frames - just remember to distribute weight evenly across the shelf.
Maintenance Tips to Keep Floating Shelves Sturdy Over Time
Even the strongest floating shelves need a little care. To keep yours safe and strong for years:
-
Inspect screws and brackets every few months to ensure nothing has loosened.
-
Avoid overloading. Stick to the weight limits of your brackets and materials.
-
Re-seal or re-oil the wood every couple of years to prevent moisture damage and warping.
Following these simple habits will keep your floating shelves both sturdy and stylish for decades.
1. How much weight can sturdy floating shelves hold?
It depends on the material and bracket type, but a well-installed hardwood shelf anchored to studs can support 50–100 pounds easily.
2. What’s the best wood type for heavy-duty floating shelves?
Hardwoods like oak, maple, and walnut are excellent choices for long-term strength and durability.
3. How can I fix sagging floating shelves without removing them?
You can add hidden L-brackets beneath or reinforce the back with wall-mounted steel supports to regain balance.
Strong, level, and beautiful - that’s the ideal combination for any floating shelf. By following these steps and using the right materials, you can create a set of shelves that don’t just look good, but truly last.
Now that you know how to make sturdy floating shelves, it’s time to start your own project. Explore Tailor Wood Haven’s hardwood floating shelves for inspiration and transform your walls into functional art pieces that stand the test of time.
 Skip to content


 Farmhouse Floating Shelves – Perfect handcrafted furniture
 Farmhouse Narrow Console Table with Storage for Entryway or Living Room
 Custom Rustic Console – Natural Wood, Made to Order


