Your cart (0)
Your cart is empty
Tax included and shipping calculated at checkout
Recommended products


Drawer menu
Tax included and shipping calculated at checkout


Tired of bulky cabinets and dark walls? Floating shelves are the modern solution, but kitchen storage needs to be strong enough for heavy dishware. This guide shows you how to build floating kitchen shelves using the strong box-frame method. This way of building makes the shelf super strong and uses hidden brackets for a clean, open look. Learn how to make shelves that are sturdy, waterproof, and look like a professional installed them, instantly giving your kitchen a brighter, more open feel.
Getting kitchen needs and materials right ensures your shelves stay strong and look great when learning how to build floating kitchen shelves.
For the outer box, we recommend using common pine wood (like 1x8 or 1x10). Pine costs less, is easy to find, and is simple to cut with basic tools. Even though pine is a softer wood, it takes stain well and gives you the bright, airy look modern kitchens need. Remember that the shelf's strength comes from the rigid box shape and strong hardware, so you can use this lighter wood for the visible shell. This smart box build is key to learning how to build floating kitchen shelves that actually work.

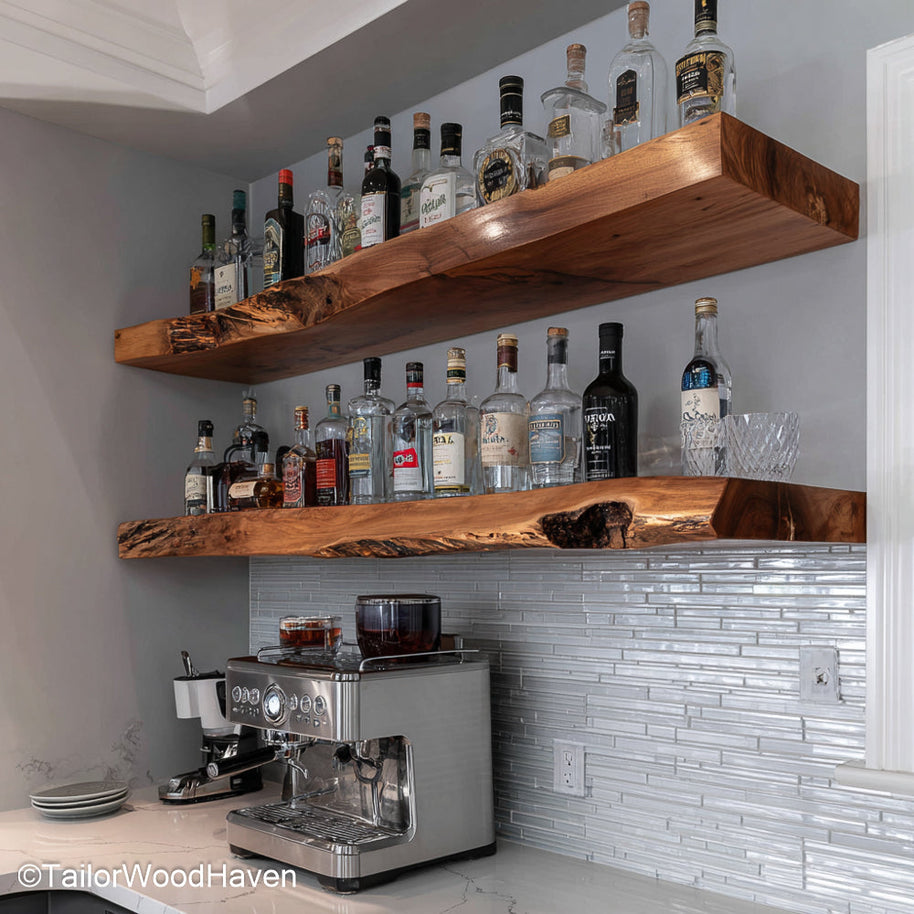
If you're looking for shelves made with premium, hard woods like genuine walnut or oak, not pine, buy these floating shelves that deliver high-end quality directly to your kitchen.
Depth: Your shelves must be functional. They need to be at least 10 to 12 inches deep to safely hold standard dinner plates and bowls. If they are too shallow, things might fall off.
Thickness: Aim for a finished shelf that is 2 to 3 inches thick. This bulk makes the shelf look strong enough to match your cabinets and appliances.
Spacing: When learning how to build floating kitchen shelves, leave 12 to 18 inches between shelves so you can easily grab mugs and glasses. For the lowest shelf, ensure 18 to 20 inches of clearance above the countertop.
Gathering all your tools and materials makes the assembly process fast and easy when learning how to build floating kitchen shelves.
Pine lumber (1x8 or 1x10 pieces cut to length)
Miter saw
Finish nailer
Wood glue
Tape measure
Wood filler
Wood stain
Sandpaper (120 to 220-grit)
Hidden mounting brackets
Stud finder
Long level
Drill/driver
This process uses simple joining techniques – just strong wood glue and finish nails – to quickly and strongly put together the hollow box shell you need for reliable floating kitchen shelves.
Each shelf needs five pieces from your 1x pine: the Top, the Bottom, two Sides (for the depth), and one Front trim piece. Cut the top and bottom pieces to your final shelf length. Then, cut the two side pieces to your desired depth (like 10 inches). It is a key rule when learning how to build floating kitchen shelves that all these pieces must be cut perfectly square (90-degrees) with your saw. This high level of precision stops gaps and makes sure the shelf fits together cleanly.
First, use plenty of wood glue on the inside edges of the two side pieces – the glue gives your shelves their long-term strength. Place the top and bottom pieces around the two sides, clamp them tightly, and then use your nailer to secure the box quickly. Nailing into the wood grain makes the shell very strong and rigid. Next, glue and nail the long front trim piece onto the open side. This trim hides all the rough edges and is an important step in learning how to build floating kitchen shelves that have that seamless, floating look.
First, sand the entire shelf very well, starting with 120-grit and finishing with 220-grit. A super smooth surface is needed so your kitchen shelves are easy to wipe clean. Next, use wood filler to hide all the nail holes on the shelf's outside and sand them smooth. After staining, the most important step for kitchen durability is to apply at least three coats of strong, oil-based polyurethane sealer. This waterproof finish is a must-do to protect the wood from steam, spills, and moisture, which is key to learning how to build floating kitchen shelves that last a long time.
Take your time with the finishing steps, and your beautifully sealed wood will be just as waterproof and stunning as the finish on our kitchen floating shelves.
First, use a stud finder to mark the center of the wall studs where the shelf will go. The brackets must go into these studs. Next, measure carefully and drill the holes for your hidden brackets, making sure the holes are perfectly level.
Now you can mount the shelf: slide the finished box over the bracket rods. Tap it gently with a rubber mallet until it is fully flat against the wall. Secure the shelf to the rods with small screws to stop it from moving. This is the last step in learning how to build floating kitchen shelves that are safe and strong. If you're looking for a guide with pictures, check out this tutorial.
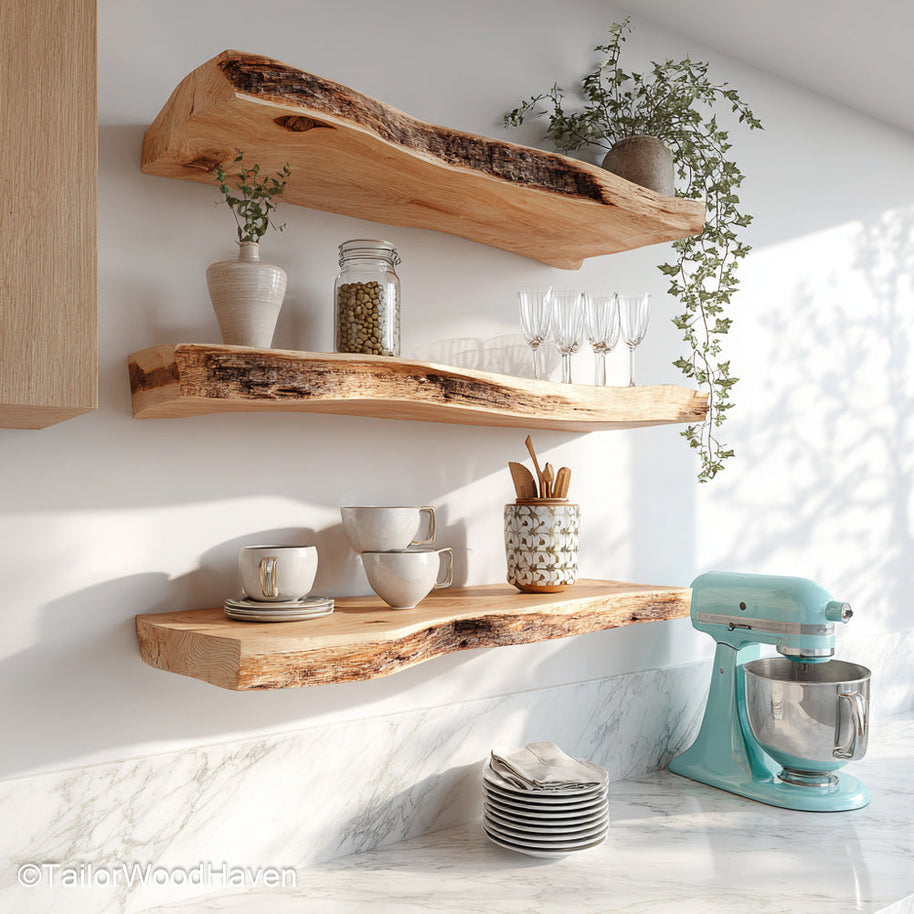
Is all this work on how to build floating kitchen shelves still too difficult? Skip the hassle and buy these rustic floating shelves instead!
Learning how to build floating kitchen shelves is straightforward, but avoiding these common mistakes ensures your project is safe, durable, and looks professional.
Relying on Drywall Anchors: Kitchen shelves hold heavy ceramics and glassware. You must anchor the hidden brackets directly into the center of the wall studs. Any reliance on plastic drywall anchors will lead to sagging and potential collapse.
Skipping the Polyurethane Seal: You must apply at least three coats of a waterproof sealer. If you don't, the wood will stain and warp over time. This sealing step is crucial for long-term durability when learning how to build floating kitchen shelves.
Ignoring the Level: A shelf that is even slightly off-level immediately ruins the seamless floating illusion. Always use a long, quality level when marking the bracket lines and again after the shelf is fully mounted.
Shallow Depth: Building shelves less than 10 inches deep is a mistake because standard dinner plates will not sit securely. When mastering how to build floating kitchen shelves, always prioritize functional depth over narrow aesthetics.
For styling, always put your heaviest items (like big plates or mixing bowls) on the lowest shelf and keep them close to the wall supports for the best stability. Don't completely fill the shelf; leaving about 40% of the space empty prevents the shelf from looking cluttered and too heavy. To keep a clean look, group similar items together (all glassware, all white dishes) and use consistent colors for a minimalist style.

To ensure your kitchen stays perfectly organized and stylish, buy our floating shelves. They are built to be very stable, even when you put heavy dishes on them.
Because you learned how to build floating kitchen shelves with a strong waterproof seal, cleaning is simple. Wipe the shelves down weekly with a mild soap and water solution. This easy care helps you quickly remove kitchen grease and dust, which keeps your new shelves looking their best and protects your hard work for years to come.
Yes, they are great for opening up a small kitchen and displaying beautiful dishware. However, they are only a good idea if you are committed to keeping them organized and wiping them down regularly to prevent dust and grease build-up.
They look best placed in areas that need visual balance, such as next to a large appliance (like a refrigerator or range hood) or above a coffee station. Avoid placing them directly above the stove or sink, as steam and splashing water can damage the wood over time.
Display items that are both functional and attractive. Good options include stacks of matching plates, grouped glassware, uniform jars of spices, or small potted herbs. Avoid clutter by only putting out items you use regularly.
For functionality, the depth should be 10 to 12 inches to fit standard dinner plates. The thickness should be 2 to 3 inches for visual weight. Length is determined by your wall space, but always align the ends with wall studs for mounting.
You've successfully mastered how to build floating kitchen shelves using the strong, simple box-frame method with high-strength, direct-mount brackets. This approach provides the exceptional load-bearing capacity, seamless installation, and professional finish required for a functional, stylish kitchen. By prioritizing stud mounting and applying a heavy-duty waterproof finish, you've ensured your shelves are durable, beautiful, and custom-made. Enjoy the open feel and modern elegance of your new custom floating kitchen shelves!


