Making your own DIY rustic floating shelves is a perfect weekend project. They bring classic farmhouse style and useful storage to any room without messy, visible brackets. Rustic wood is very forgiving to work with, as bumps and natural dents only add to the final character. This guide will show you how to select lumber, and securely stain and seal the wood. Finally, you will learn how to safely install the strong, hidden hardware so your custom DIY rustic floating shelves are beautiful and rock-solid.
Planning and Preparation for Your Project
Good preparation makes sure your shelves have the perfect rustic texture and are strong enough to install. This is the first step for great DIY rustic floating shelves.
Choosing the Right Lumber
For the best look, choose rough-cut wood like pine, fir, or oak. Pine is a top pick because it costs less and takes dark stains very well. Avoid smooth, finished wood, as it looks too clean for a true rustic style. Instead, look for pieces with natural knots and rough grain. Finally, ensure the wood is at least 1.5 inches thick to hide the mounting hardware and give your DIY rustic floating shelves the necessary visual weight.

You should choose quality wood like these wooden floating shelves, which are crafted from thick, character-rich wood, guaranteeing the authentic rustic look your DIY plan requires.
Cut List & Prep: Shaping Your DIY Rustic Floating Shelves
Precise measurements and preparatory cuts ensure the best fit and stability for your DIY rustic floating shelves:
-
Determining Length: Base the shelf length on standard wall stud placement (usually 16-inch centers). Common lengths like 24", 36", and 48" ensure the brackets hit multiple studs.
-
Cutting: Use a miter saw for clean, square cuts. If using rough lumber, double-check that the back edge that meets the wall is perfectly straight.
-
Edge Clean-Up: Slightly round the front edge with a sander (optional) to soften the look, but leave the remaining surfaces rough for that rustic character.
-
Pre-Drill & Dry-Fit: Before applying any stain, mark and pre-drill all the necessary mounting holes for the hidden hardware. Always dry-fit the hardware into the shelf to ensure a smooth installation process later.
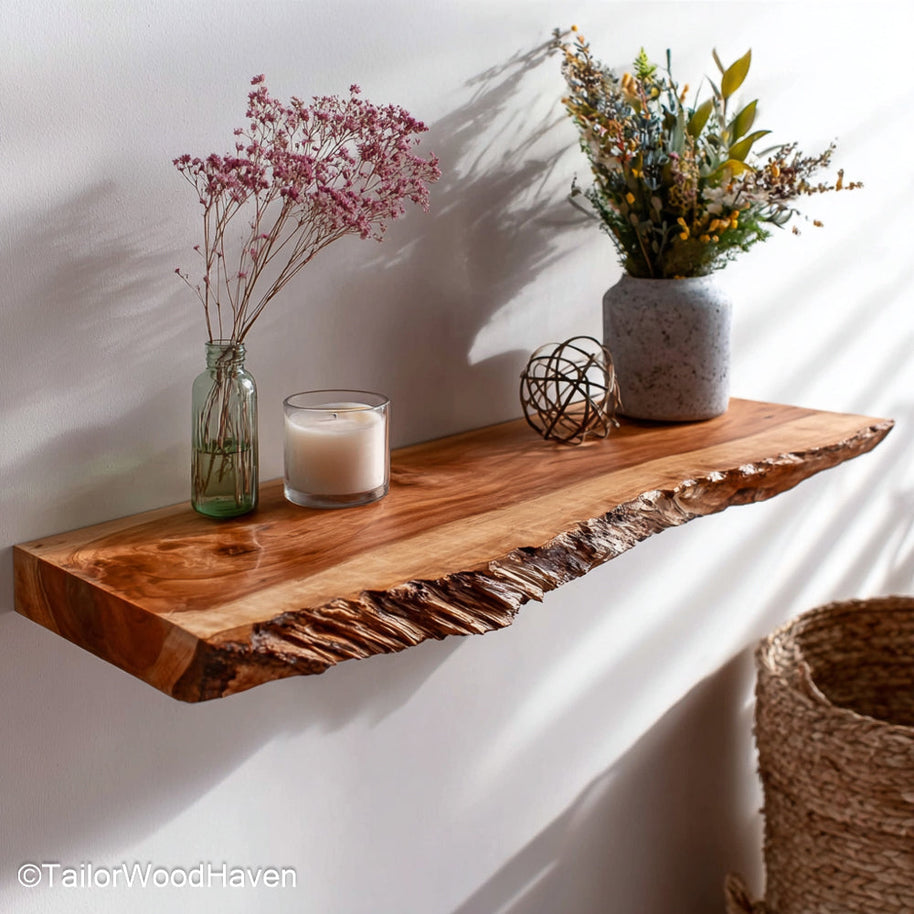
Save time on cutting! This wooden floating shelf is ready to go, offering a guaranteed straight back edge for that quick, perfect flush fit against your wall.
Finishing and Sealing the Wood
Proper staining and sealing protects the shelf while deepening the rustic character, ensuring the longevity of your DIY rustic floating shelves.
Staining for Depth and Character
Before staining, you must apply wood conditioner, especially to soft woods like pine. This stops the wood from soaking up the stain unevenly and prevents a blotchy look, giving you a smooth, professional result. For the best rustic look, choose dark stains like dark walnut or weathered gray. Apply the stain and wipe it off quickly. This lets the color sink deep into the wood's texture, making the rustic features of your DIY rustic floating shelves stand out clearly.
Sealing and Protection
Applying at least two coats of a strong sealer, like polyurethane, is very important to protect the wood from water, especially if you have your shelves in a kitchen or bathroom. When choosing a sealer, pick only a matte or satin finish. A high-gloss sealer will look too modern and ruin the authentic rustic appeal. For a soft feel and very low shine, you can use a natural wood wax or oil instead. This simple final step protects your DIY rustic floating shelves and preserves their great texture.
Carefully finish your shelf to ensure it stays protected and looks amazing. The final sealing will be as beautiful and durable as the finish on this floating shelf.
Mounting and Securing Your Floating Shelves
Secure installation is key for safety and to keep that sought-after "floating" look. Since rustic wood is thick and heavy, you must use strong, robust hardware for your DIY rustic floating shelves.
Choosing the Right Heavy-Duty Hardware
-
Metal Rod Brackets: Ideal for deep shelves (9 inches plus), these require precise drilling into the wood's back edge using a jig or drill press.
-
Channel Brackets: Offer more forgiveness in placement and distribute the weight across a wider area, but the channel needs to be routed into the back of the shelf for a perfectly flush fit.
Mounting the Brackets
For a successful installation, you must first find the wall studs and mark their centers. An off-level bracket is a common mistake, so use a level to draw a perfect straight line on the wall before you start drilling. Use high-quality, strong lag screws to firmly attach the brackets to the studs. This careful work is essential for the stability and safety of your DIY rustic floating shelves.
Mounting the Shelf
Carefully mark the exact spots for the bracket rods onto the back of your shelf – this precision is vital. Use the correct drill bit to bore the mounting holes. Now, slide the shelf onto the rods, tapping gently until it sits perfectly flat against the wall. This snug fit makes your DIY rustic floating shelves look like they are magically growing right out of the wall.
Avoiding these common pitfalls will save time and ensure the structural longevity of your project.
-
Missing the Studs: Relying on drywall anchors alone will inevitably fail under the concentrated weight of thick, rustic wood and decor. Always hit the studs.
-
Skipping the Pre-Stain Conditioner: This results in a blotchy, unprofessional stain job, particularly noticeable on large pieces of porous wood like pine.
-
Drilling Off-Center: Failing to use a jig or guide when drilling the shelf holes. This causes the shelf to tilt, wobble, or simply not fit onto the rods, ruining the floating effect.
-
Using High-Gloss Sealer: A high-gloss finish instantly ruins the rustic aesthetic by giving the wood an unnatural, modern sheen. Always use matte or satin polyurethane.
-
Ignoring the Level: A shelf that is even slightly off-level looks immediately unprofessional and highlights the floating illusion in a bad way. Always check the level of the wall bracket and the shelf itself.
Styling Rustic Floating Shelves
The way you style your shelves should work with the wood's warm texture, not against it, to make your DIY rustic floating shelves look their best. For more ideas on shelf styling, check out this tutorial.
-
Pairing Textures: To highlight the rustic wood's texture, use sharp contrast by pairing it with smooth, modern items like white ceramics or clear glass. For extra cozy warmth, add soft elements such as woven baskets, macrame, or linen to soften the wood's hard edges.
-
Color and Objects: Stick to warm, earthy tones (creams, greens, blues) for a natural, farmhouse feel. Decorate using functional, vintage items like old books, antique dishes, or potted herbs to support the charming, practical rustic style.
-
Layering: Always group your objects in odd numbers on your DIY rustic floating shelves, as this is more visually pleasing than even numbers. Create essential depth and interest by layering items, placing framed art against the wall with smaller objects set in front.
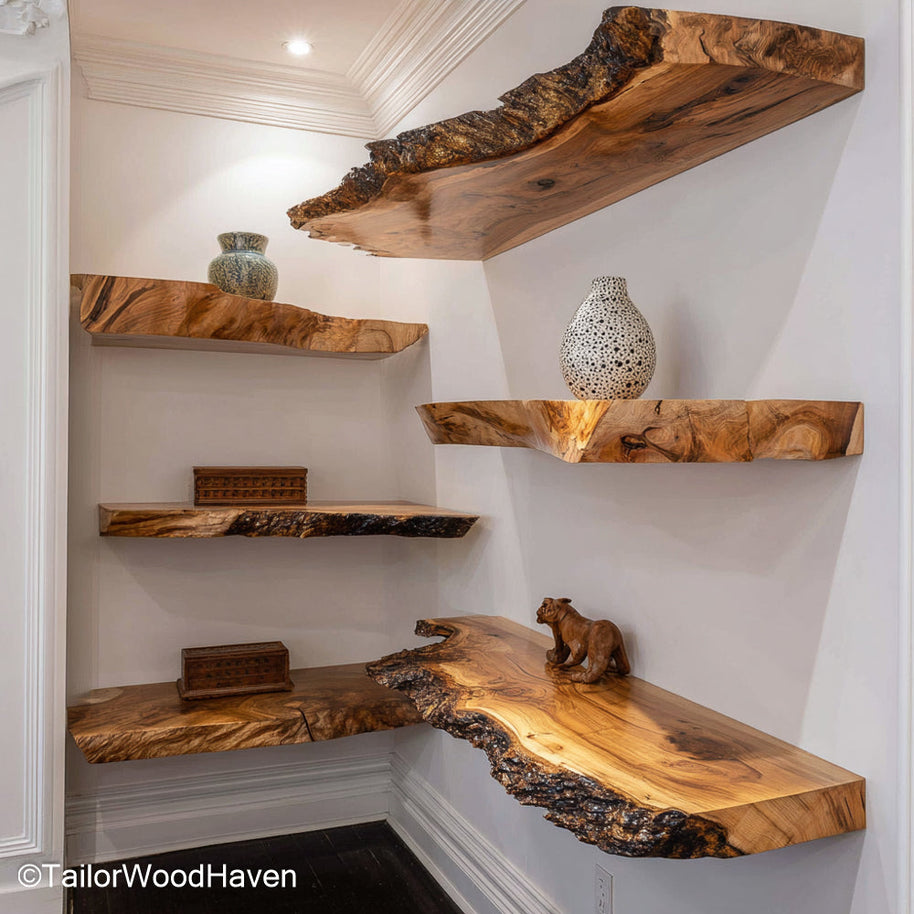
Ready to style? These wooden floating shelves are the ideal textured foundation, providing the authentic, warm wood your contrastive ceramics and layered décor need to truly pop.
FAQs about Floating Shelves
What is the standard size for floating shelves?
There is no single standard size, as shelves should be sized to fit your wall space. Common lengths align with stud spacing, such as 24, 36, or 48 inches. The most crucial dimension is ensuring your shelves are long enough to anchor securely into at least two wall studs.
What is the spacing for floating shelves?
The spacing between stacked shelves is typically 12 to 18 inches. The exact measurement should be based on the height of the items you plan to display. Always add 2–3 inches of clear space above your tallest item.
How thick should floating shelves be?
For a proper rustic look and to securely accommodate hidden rod hardware, shelves should be at least 1.5 to 2 inches thick. This thickness provides the necessary visual weight and structural depth required for the floating effect.
How high should floating shelves be?
The height depends on the shelf's function. If the shelf is purely decorative, the center of the display should be near eye level (about 57 to 60 inches from the floor). For functional storage, the shelf should be placed at an easy-to-reach height, often around shoulder level.
Building custom DIY rustic floating shelves is an achievable and incredibly rewarding project that adds substantial character and custom storage to your home. By meticulously preparing the wood, and ensuring a safe, secure installation using heavy-duty hidden hardware, you have successfully transformed affordable lumber into a high-end, bespoke feature. Enjoy the lasting warmth and authentic style that your new handmade DIY rustic floating shelves bring to your space.
 Skip to content


 Farmhouse Floating Shelves – Perfect handcrafted furniture
 Farmhouse Narrow Console Table with Storage for Entryway or Living Room
 Custom Rustic Console – Natural Wood, Made to Order


