Your cart (0)
Your cart is empty
Tax included and shipping calculated at checkout
Recommended products


Drawer menu
Tax included and shipping calculated at checkout
Your wishlist is empty.
Continue shopping


Creating your own floating shelves is a deeply satisfying DIY project, offering a chance to add a truly custom, high-end touch to your home for a fraction of the cost.
This guide will walk you through every step of the process, ensuring that even if you're a complete beginner, you'll be confident in your ability to master how to make live edge floating shelves.
The journey to crafting a beautiful floating shelf begins with selecting the right piece of wood and gathering the necessary tools.
This initial preparation is crucial for a smooth and successful project. Understanding the fundamentals of how to make live edge floating shelves starts here.
Wood Selection: The journey begins with choosing the right piece of wood. Hardwoods like oak, walnut, maple, and cherry are excellent choices due to their durability and beautiful grain.
Best Woods: Walnut is a top choice for its rich, dark color and dramatic grain. Moreover, oak offers a timeless and classic look.
Finding Slabs: The best way to get a great piece is to find a local sawyer or lumber yard that specializes in wood slabs.
Additional Resources: For a deeper dive into selecting the perfect slab, check out the excellent tutorial by Wilkerdos. You can find her guide here: Wilkerdos' Full Tutorial.
Here is a comprehensive list of tools you might need to know how to make live edge floating shelves successfully.
|
Tool |
Purpose |
|
Saw |
To cut the wood to your desired length. A miter saw or a circular saw with a guide will give you a clean, straight cut. |
|
Router or Planer |
Essential for flattening the wood's surface. A router with a flattening sled is a popular DIY method, but a planer is faster and more efficient if you have access to one. |
|
Sander |
With various grits (e.g., 80, 120, 180, 220, 320) to smooth the surface and prepare it for finishing. An orbital sander is ideal for this task. |
|
Chisel or Small Router |
To carve the precise channels on the back of the shelf for the hidden brackets. This is a critical step in how to make live edge floating shelves. |
|
Drill |
To drill holes for the brackets and to mount the brackets to the wall. |
|
Tape Measure and Level |
For accurate measurements and straight installation, a good level is a must-have. |
|
Epoxy Resin (Optional) |
To fill any natural cracks or voids in the wood, creating a stable and visually appealing surface. |
|
Oil or Varnish |
To protect and finish the wood, bringing out its natural beauty. |
This is where the magic happens. Turning a rough slab of wood into a finished piece of furniture is an incredibly rewarding process. These steps are the core of mastering how to make live edge floating shelves.
Start by cutting your wood slab to the desired length. Use a router with a flattening jig to make the surfaces flat.
Then, sand the wood, starting with a low grit (like 80) and working your way up to a fine grit (220) for a smooth finish.
If there are any large cracks in the wood, use epoxy resin to fill and stabilize them. Once the epoxy is cured, sand it flush with the wood surface.
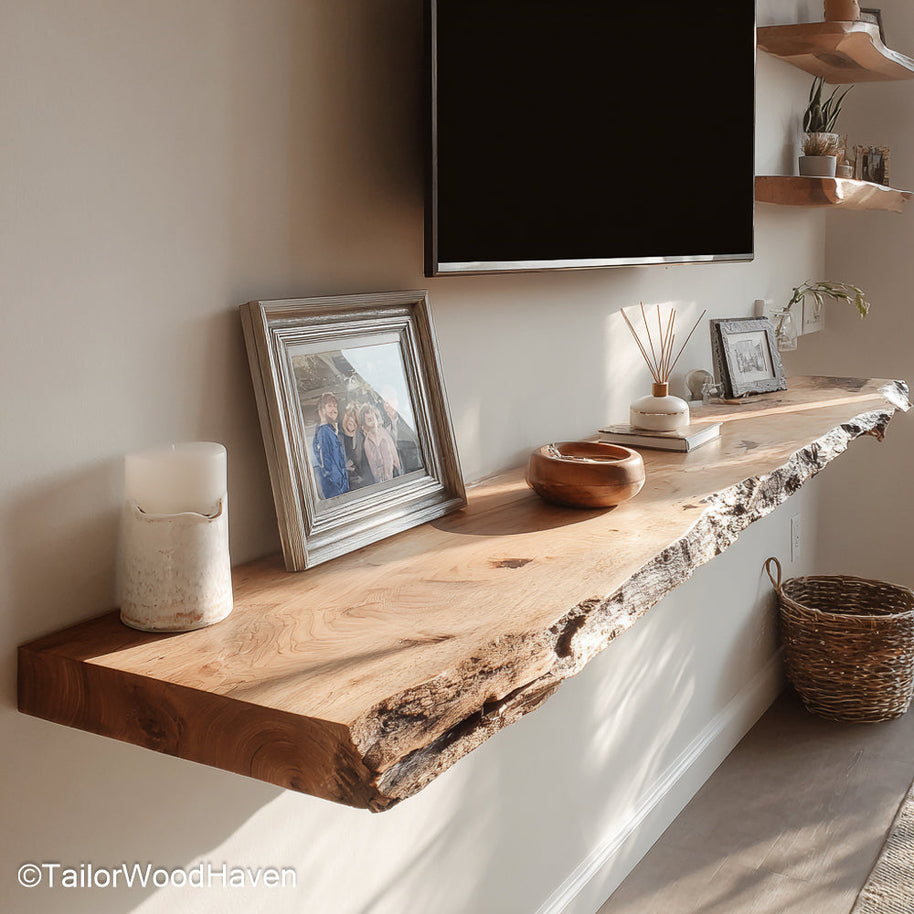
This shelf features a rustic oak finish and concealed brackets, perfect for a classic home or cabin look.
To protect the wood and highlight the grain, apply a high-quality oil or wax finish with a clean cloth. You might need to apply multiple coats.
This is the most critical step. Use a drill press or a drill guide jig to drill perfectly straight and level holes on the back of the shelf. This ensures it will sit securely on the wall brack
It's the moment when all your hard work pays off, and you truly master how to make live edge floating shelves that look professionally done.
Begin by using a level to draw a perfectly straight line on the wall where the shelf will sit. Use a stud finder to locate the wall studs and mark them along this line.
For the strongest and most secure installation, you'll want to mount your brackets directly into the studs, especially if the shelf will hold heavy items.
This meticulous approach to installation is a critical part of knowing how to make live edge floating shelves correctly.
Floating shelf brackets have a backplate that secures to the wall and rods that slide into the back of your shelf.
For a detailed guide on this process, you can reference the Instructables tutorial here. Carefully align the backplate with your marked line and screw it firmly into the studs.
The rods must be perfectly level and spaced to match the holes in your shelf. This is the moment when you see the results of your hard work on how to make live edge floating shelves.
These white floating shelves boast a smooth matte finish and clean lines, ideal for achieving a bright, minimalist Scandinavian aesthetic in any modern room.
Gently slide your shelf onto the rods. If it's a tight fit, a rubber mallet can help tap it into place. Check the shelf with your level one last time to ensure it is perfectly horizontal.
For added security, some brackets have set screws to lock the shelf in place. This final step solidifies your understanding of how to make live edge floating shelves from start to finish.
The beauty of a DIY project is the ability to customize it to your specific needs and design aesthetic. The basic principles of how to make live edge floating shelves can be applied to many different styles and applications.
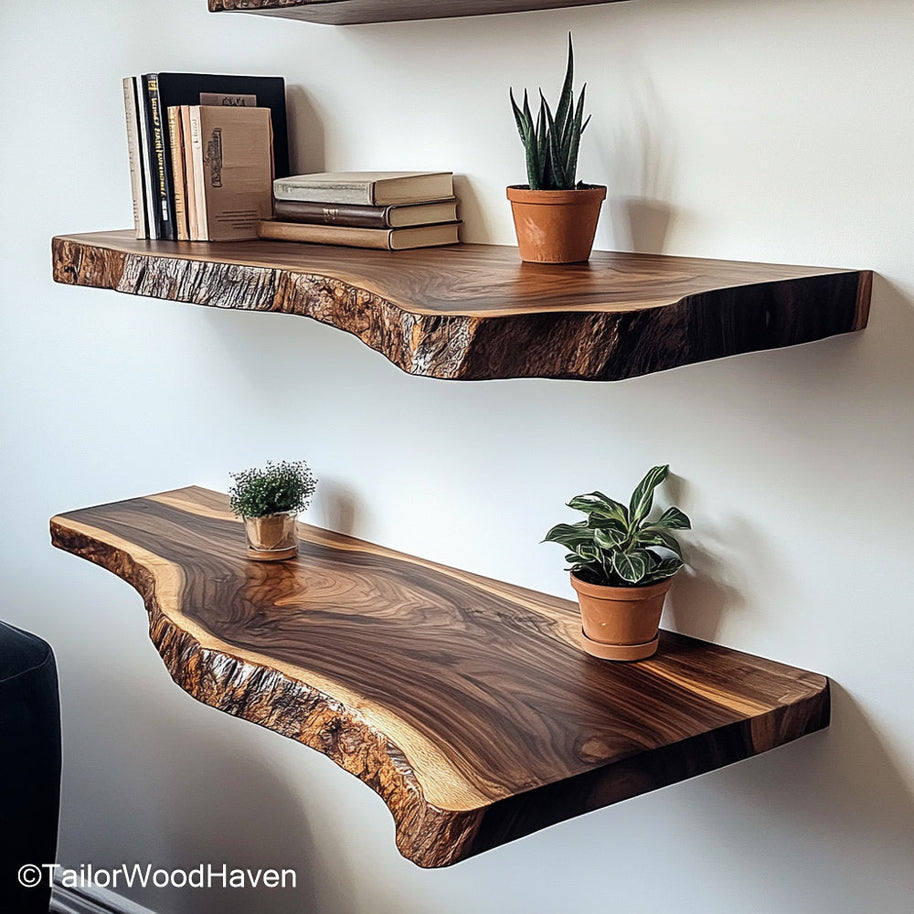
Perfect for displaying small plants, candles, or family photos. These can be made from smaller offcuts of wood and are great for adding a touch of nature to a bedroom or bathroom.
Knowing how to make live edge floating shelves on a smaller scale is a great way to use up leftover materials.
A single, long, live edge shelf can replace upper cabinets in a kitchen, creating an open and airy feel. This style works well for displaying dinnerware or glassware.
When thinking about how to make live edge floating shelves for a kitchen, be sure to use a durable finish that can withstand moisture and frequent cleaning.
You can cut and join two live edge pieces at a 45-degree angle to create a unique floating corner shelf.
This is a brilliant way to utilize often-wasted space and showcase your skills in how to make live edge floating shelves.
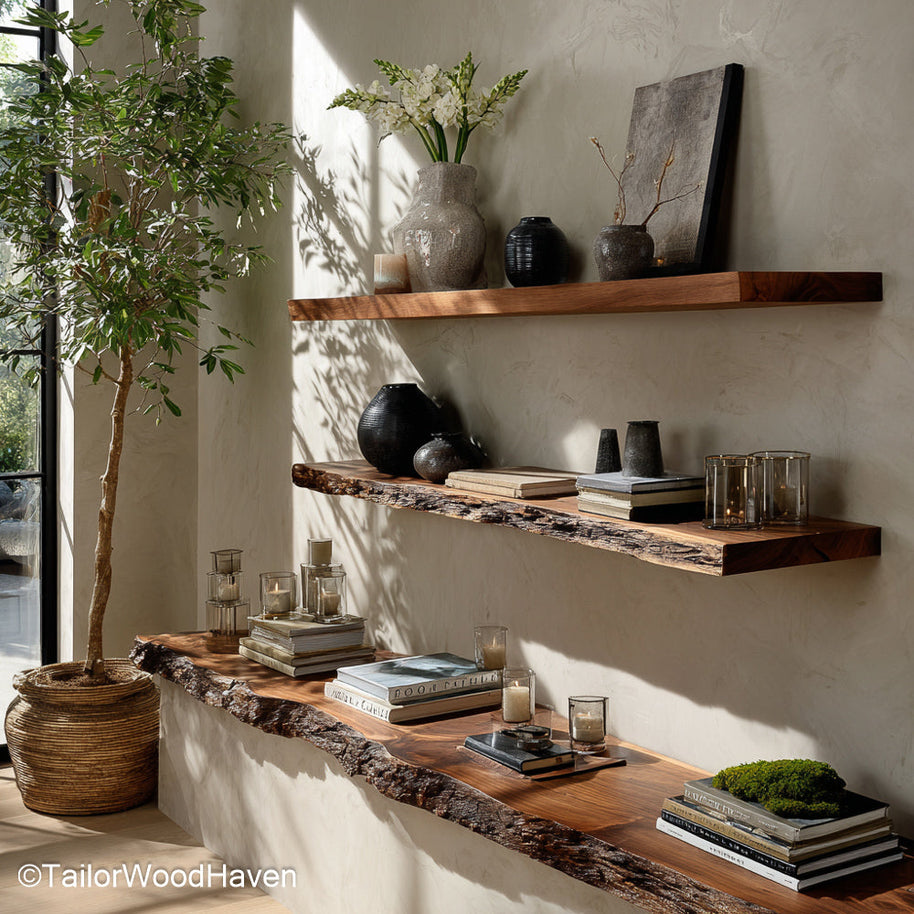
Designed with a prominent thick wood grain and a natural freeform edge, these shelves offer a rustic yet elegant wall-mounted storage solution.
Caring for your live edge shelf is key to ensuring its beauty lasts for years to come. This is a final, but important part of learning how to make live edge floating shelves.
Regularly dust your shelf with a soft cloth. Every 6-12 months, consider re-applying a coat of oil or wax finish to replenish the wood and keep it protected.
This simple routine will prevent the wood from drying out and cracking.
Wood is a natural material that expands and contracts with changes in humidity. You may notice slight movement in your shelf throughout the year.
This is normal and a sign of a real wood product. Ensuring a good finish is the best way to manage this.
1. Can I use screws only?
No, using only screws is not recommended for a true floating shelf. The shelf needs a strong internal support system to handle the weight of items without visible brackets.
The proper brackets are a key part of how to make live edge floating shelves that look and function correctly.
2. How thick should the wood be?
The ideal thickness for a floating shelf is typically between 2 to 3 inches. This thickness is sufficient to hide the bracket rods while providing a substantial, sturdy look and feel. Thicker wood is also more stable and less prone to warping.
3. How to make live edge floating shelves safe for heavy books?
For heavy items like books, you must mount the brackets directly into studs.
Use high-quality steel floating shelf brackets and ensure the wood is thick enough to accommodate the bracket rods. The stability of your shelf depends entirely on the installation, so don't cut corners.
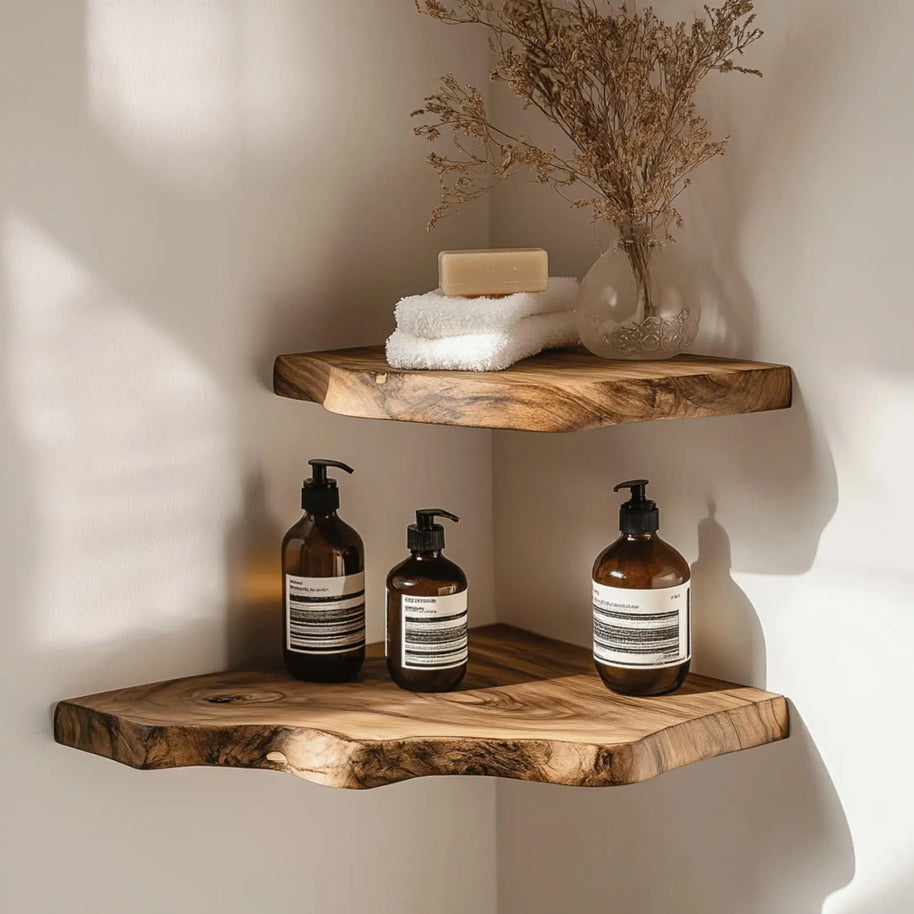
A set of rustic corner shelves crafted with a genuine live edge wood design, perfect for maximizing storage in tight, angled spaces.
Learning how to make live edge floating shelves is a rewarding journey that combines creativity with practical skill.
The beauty of a DIY live edge shelf lies not just in its rustic charm but in the pride you'll feel every time you see a piece of nature you've transformed with your own hands.
So go ahead, find that perfect piece of wood and get started on your own project. You now have the knowledge you need on how to make live edge floating shelves.


