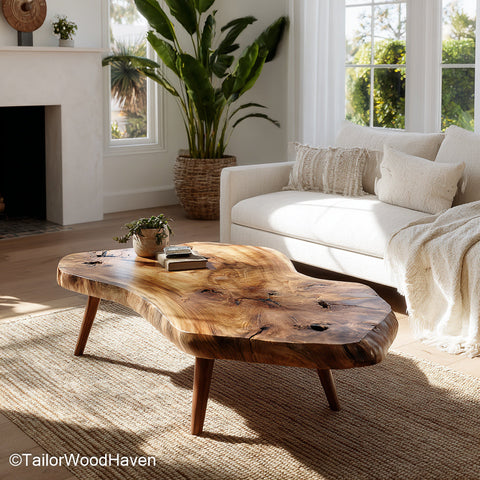
A live edge slab brings out the natural beauty of wood, but its surface may be uneven, twisted, or warped. Before turning it into a coffee table or another piece of furniture, you need to create a flat, stable surface without removing more wood than necessary.
The good news is that you don't always need a large industrial planer. With the right setup, a router sled can flatten most slabs suitable for this method. Here's how to flatten a live edge slab, which tools to use, and how to avoid common mistakes.
What You Need Before Flattening a Live Edge Slab
Before starting, inspect the slab and gather the tools needed for safe, controlled material removal.
Essential tools and materials include:
-
A router with sufficient power and cutting depth
-
A slab flattening bit compatible with your router
-
A router sled and two straight, rigid rails
-
A stable workbench or support frame
-
Shims and clamps to secure the slab
-
A straightedge or reliable straight reference
-
A level and measuring tools
-
A random orbital sander and appropriate sandpaper
-
Eye and hearing protection and a suitable dust collection system
Check the slab for cupping, bowing, twisting, cracks, and loose bark or debris. These conditions affect how you position the wood and how much material you may need to remove.
Moisture content matters, too. If the slab is still drying or its moisture content is unstable, flattening it too early may lead to further movement. Learn more about drying live edge slabs before machining the wood.
Finally, determine your target dimensions and finished thickness. This helps you avoid removing too much material during flattening.
How to Flatten a Live Edge Slab With a Router Sled
A router sled is a practical option for flattening slabs that are too wide for a standard planer. The router moves across a pair of level rails, gradually removing high spots until the surface becomes flat.
1. Inspect and Secure the Slab
Place the slab on a stable work surface and identify its highest and lowest points. Check for twisting by comparing the corners and checking the surface in multiple directions.
Use shims to support low areas and prevent the slab from rocking. Secure it with clamps or suitable stops so it cannot shift during routing.
Avoid forcing a naturally irregular slab into a flat position. Doing so can introduce stress that may affect the wood after it is released.
2. Level the Router Sled Rails
Position the rails on either side of the slab. They must be rigid, parallel, and set at a consistent height so the router can travel across the entire surface.
Use a reliable straightedge and level to check the setup. Move the router sled along the rails to confirm that it travels smoothly without rocking or binding.
The rails establish the reference plane for flattening. If they are uneven or unstable, the finished slab may still have high and low spots.
See more: How to make a Live Edge Coffee Table
3. Make Shallow, Overlapping Router Passes
Set the router bit to remove a small amount of material per pass. Start at one end of the slab and move the router steadily across the surface.
Overlap each pass slightly to avoid leaving ridges between cuts. Continue working across the slab until the high spots have been removed and the surface is consistently flat.
Avoid aggressive cuts. Taking off too much wood at once can strain the router, produce a rougher surface, and make the process harder to control.
After each series of passes, inspect the surface and adjust the cutting depth as needed. Continue until the entire face has been flattened.
4. Flatten the Opposite Side
Once the first face is flat, you can use it as a reference when preparing the opposite face.
Flip the slab carefully, support it securely, and check its position before routing. Depending on the slab's condition and intended use, you may need to remove material from the second side to achieve the desired thickness and overall stability.
Keep checking the remaining thickness as you work. For a coffee table, the target should account for the slab's dimensions, design, and support structure. See our guide on how thick a live edge table slab should be before deciding how much material to remove.
5. Sand the Surface Smooth
Router bits can leave shallow grooves or visible machining marks. After flattening, use a random orbital sander to smooth the surface.
Start with an appropriate grit to remove machining marks, then progress through finer grits until you achieve the desired finish. Remove dust between sanding stages.
Sanding should refine an already flat surface, not compensate for major unevenness. If deep ridges remain, correct them before moving to finer grits.
Once the surface is smooth, follow the appropriate sealing and finishing process for your wood species and intended use. Our guide on how to finish a live edge slab explains how to protect the wood while highlighting its natural grain.
Other Ways to Flatten a Live Edge Slab
A router sled is not the only option. The best method depends on the slab's dimensions, condition, available equipment, and how much material needs to be removed.
Using a Wide Planer
A wide planer can flatten a slab efficiently when the machine can accommodate its width and thickness.
However, the slab must be suitable for the machine and properly supported. A planer may also struggle to correct significant twisting if the wood is not prepared correctly before machining.
For oversized slabs, check the machine's capacity before choosing this method.
Using a CNC Machine
A CNC machine can flatten large slabs through controlled cutting paths. It is particularly useful when the workshop has the right equipment and the slab requires precise machining.
The main disadvantages are equipment cost and limited access for many home woodworkers. For a one-off project, professional CNC services may be more practical than purchasing the equipment.
Using Hand Planes
Hand planes can remove high spots and refine a slab's surface without powered flattening equipment.
This method requires patience, sharp tools, and woodworking experience. It is generally more practical for smaller slabs or localized corrections than for flattening large, severely twisted slabs.
For substantial unevenness, a router sled or professional machining service is usually more efficient.
How to Avoid Removing Too Much Wood
The goal is to create a flat surface while preserving as much usable thickness as possible.
Follow these practices:
-
Identify high spots first. Check the entire slab before making the first cut so you understand where material needs to be removed.
-
Take shallow passes. Gradual cuts give you more control and make it easier to monitor progress.
-
Check the thickness regularly. Measure several points across the slab instead of relying on a single measurement.
-
Plan for the finished dimensions. Account for the thickness needed after flattening, sanding, and finishing.
-
Don't rush severely warped slabs. Significant twisting may require substantial material removal. If flattening would leave the slab too thin, consider professional advice before proceeding.
The amount of wood removed depends on the slab's initial condition. A relatively flat slab may require minimal correction, while a severely twisted slab may lose considerably more thickness.
Common Mistakes When Flattening a Live Edge Slab
Even with the right equipment, a few mistakes can affect the final result.
Using unstable supports: If the slab moves or rocks during routing, the finished surface may become uneven. Secure the wood and support it properly before starting.
Setting uneven rails: Router sled rails that are not level and stable can produce an inaccurate reference plane. Check the setup across the full working area.
Taking cuts that are too deep: Aggressive cuts can strain the router and make the surface harder to control. Use shallow passes and inspect the results regularly.
Ignoring moisture content: Wood can continue to move as its moisture content changes. Allow the slab to dry and stabilize before flattening whenever possible.
Removing too much material: Flattening without checking the remaining thickness can compromise the slab's intended dimensions. Establish a target thickness before machining and monitor it throughout the process.
Skipping the final inspection: Check the flattened face with a straightedge in multiple directions before sanding and finishing. Correct any remaining unevenness before proceeding.
A careful setup and gradual material removal will generally produce a better result than trying to flatten the slab as quickly as possible.
If you want to see how natural wood slabs become finished furniture, explore our live edge coffee tables collection at Tailor Wood Haven. Each piece showcases the distinctive grain and organic contours that make live edge wood unique.
 Skip to content


 Farmhouse Floating Shelves – Perfect handcrafted furniture
 Farmhouse Narrow Console Table with Storage for Entryway or Living Room
 Custom Rustic Console – Natural Wood, Made to Order