DIY Round Coffee Table: Step by Step Building Guide
Reading time: 4 mins
Article published at:
May 4, 2026
Daniel – Master Craftsman
A third-generation woodworker and workshop lead, he brings old-world joinery techniques into every build, obsessed with grain, finish, and the quiet satisfaction of wood made to last.
A DIY round coffee table is a practical weekend woodworking project that adds a custom centerpiece to your living room while costing less than many store-bought options. Whether you prefer a modern, farmhouse, or minimalist style, building your own table lets you choose the size, wood species, and finish to match your space.
This guide walks you through the essential materials, dimensions, and construction steps, making it easy for beginners and experienced DIYers alike to create a sturdy, long-lasting round coffee table.
Materials and tools
Preparing everything before you begin helps the project go smoothly and reduces mistakes during assembly.
Materials
Choose quality materials to ensure the table remains stable and durable over time.
1x6 or 1x8 wood boards (oak, pine, maple, or walnut)
Wood glue
Wood screws
Sandpaper (80, 120, 180, and 220 grit)
Wood filler (optional)
Wood stain or paint
Clear polyurethane or hardwax oil for protection
Figure-8 fasteners or tabletop fasteners (recommended)
Tools
Most woodworking shops already have these basic tools.
If you have a larger seating area, increase the tabletop diameter to 40–42 inches while keeping the height around 18 inches.
How to build a DIY round coffee table
Step 1. Cut the wood pieces
Cut all boards according to your measurements and inspect each piece before assembly. If you're using multiple boards for the tabletop, keep similar grain patterns together for a more natural appearance.
Lightly sand rough edges after cutting to improve accuracy during glue-up.
Step 2. Glue the tabletop panels
Arrange the boards in your preferred order, then apply an even layer of wood glue along each edge. Clamp the boards tightly and check that the surface stays flat while drying.
Allow the glue to cure completely before removing the clamps. Rushing this step can create weak joints or uneven panels.
Step 3. Cut the tabletop into a circle
Once the glue has fully cured, mark the center of the tabletop and draw a circle using a router circle jig or a homemade trammel. A router produces the cleanest edge, but a jigsaw also works if you sand the edge smooth afterward.
Make several shallow passes instead of cutting through the wood in one go. This reduces tear-out and leaves a cleaner edge that requires less sanding.
Step 4. Build the table base
Build the base according to your preferred design, such as a four-leg, X-frame, or pedestal base. Before assembly, dry-fit all pieces to confirm they are square and level.
Secure the joints with wood glue and screws or dowels for added strength. Once assembled, place the base on a flat surface to ensure it doesn't wobble.
Step 5. Attach the tabletop
Center the tabletop over the base, then secure it using figure-8 fasteners or tabletop fasteners. These allow the wood to expand and contract naturally with seasonal humidity changes, helping prevent cracks over time.
If fasteners aren't available, pre-drill pilot holes before driving screws to reduce the risk of splitting the wood.
Step 6. Sand and finish the table
Sand the entire table gradually using 80-, 120-, 180-, and finally 220-grit sandpaper until every surface feels smooth. Remove all dust before applying stain or a protective finish.
Finish the table with polyurethane, hardwax oil, or another durable wood finish. Apply two or three thin coats, allowing each coat to dry completely and lightly sanding between coats for a smooth, professional-looking result.
Tips for a better result
Use straight, dry lumber to minimize warping after assembly.
Alternate the wood grain direction when gluing boards to improve stability.
Measure from the center before attaching the base to keep the tabletop perfectly aligned.
Avoid over-tightening clamps, as excessive pressure can squeeze out too much glue.
Let the finish cure fully before placing heavy objects on the table to improve durability.
Once your table is built, browse our Round Coffee Table Decor Ideas for inspiration on styling and decorating your new centerpiece.
FAQs
What wood is best for a DIY round coffee table?
Oak, maple, and walnut are excellent choices because they're durable and resistant to dents. Pine is a more affordable option that's easier to work with, making it ideal for beginners, although it scratches more easily.
Can I make a round tabletop without a router?
Yes. A jigsaw can cut a round tabletop if you carefully follow a marked circle. After cutting, use a sander to smooth the edge and create a more uniform curve.
What is the ideal size for a round coffee table?
A diameter of 36 inches works well for most living rooms with standard sofas. For larger seating arrangements, choose a 40–42 inch tabletop while keeping the height between 17 and 18 inches for comfortable everyday use.
How long does this project take?
Most DIYers can complete the project in one weekend. Plan about one day for cutting and assembly, then allow additional drying time for glue and the protective finish before using the table.
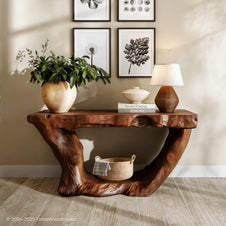
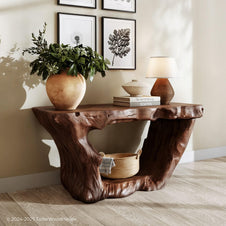
A DIY live edge console table is a great way to turn a natural wood slab into a functional piece of furniture with plenty of character. The irregular edge, visible grain, and unique shape of the wood make every table different.
The project is relatively straightforward when you break it into a few key stages: preparing the slab, sanding and finishing the wood, building the legs, and securing everything together. With accurate measurements and careful assembly, you can create a console table that works beautifully in an entryway, hallway, or behind a sofa.
What You Need to Make a DIY Live Edge Console Table
Before starting, gather the materials and tools needed for both the woodwork and assembly.
Materials:
A properly dried live edge wood slab
2×4 lumber or suitable material for the legs
Wood glue
Pocket-hole screws or structural wood screws
Wood conditioner, if needed for your chosen wood
Wood stain or a clear finish
Black paint or another finish for the legs
Tools:
Circular saw or track saw
Miter saw
Pocket-hole jig
Drill and drill bits
Belt sander
Random orbital sander
Sandpaper
Straightedge
Measuring tape
Clamps
Looking for more live edge furniture inspiration? Explore our Live edge Coffee Table wood options to find beautiful wood types and natural grain patterns for your next project.
Step 1: Prepare the Live Edge Tabletop
Start by inspecting the slab and deciding which areas you want to keep as part of the natural live edge. The goal is to remove unnecessary material without losing the organic character that makes the tabletop distinctive.
Use a straightedge to establish clean reference lines where the ends need to be squared. Once the layout is marked, carefully trim the ends with a circular saw or track saw. Make sure the slab is securely supported before cutting.
Take your time during this stage. A console table does not need a perfectly uniform outline, but the ends and mounting areas should be accurate enough to make assembly straightforward.
If the slab has cracks, loose bark, or unstable sections, address them before moving on. A stable tabletop will make the later sanding and assembly stages much easier.
Step 2: Sand and Finish the Wood Slab
Once the tabletop has been cut to shape, begin sanding to smooth the surface and prepare it for finishing.
For rough areas, start with a coarser grit and gradually move to finer sandpaper. A belt sander can help level particularly uneven sections, while a random orbital sander is better suited to refining the surface and removing visible sanding marks.
Pay special attention to the live edge. Sand it enough to remove loose fibers and sharp spots, but avoid over-shaping it. The irregular profile is part of the table's character.
After sanding, remove all dust before applying a finish. If you're working with a wood species that tends to absorb stain unevenly, a pre-stain conditioner can help create a more consistent color.
You can then apply a wood stain for a darker appearance or choose a clear finish if you want the natural grain and color to remain visible. Follow the manufacturer's drying and recoat instructions rather than rushing the finishing process.
Step 3: Prepare the Console Table Legs
The legs should complement the proportions of the tabletop while providing enough support for everyday use.
If you're building wooden legs from 2×4 lumber, measure and cut the pieces according to your desired table height and leg design. A simple rectangular frame can be made by combining longer vertical pieces with shorter horizontal sections.
Before assembling anything, dry-fit the pieces to confirm that the dimensions match. This is also a good time to sand the components, especially the edges and corners that will remain visible.
For a modern look, the wooden legs can be painted black to create the appearance of a simple metal-style base. Alternatively, you can use a natural wood finish to create a more cohesive all-wood console table.
Step 4: Attach the Legs to the Tabletop
Once the legs are assembled and finished, position the tabletop upside down on a protected work surface.
Measure from the edges to determine where the legs should sit. Keep the placement symmetrical and leave enough space around the mounting points to avoid putting unnecessary stress on the slab.
Pre-drill the attachment holes before driving in the screws. This is especially important when working near the ends of a solid wood slab because it can reduce the risk of splitting.
Pocket holes can also be useful when constructing wooden leg frames. If you use them, position the holes on less visible surfaces so the finished table maintains a clean appearance.
Use appropriate screws for the thickness and construction of the tabletop. Avoid overtightening the fasteners, since solid wood can move naturally with changes in humidity.
Step 5: Assemble and Level the Console Table
With the legs attached, carefully turn the console table upright and check its stability.
Place the table on a level surface and look for any rocking or uneven contact. If necessary, make small adjustments to the legs or add suitable leveling pads underneath them.
Check the table from several angles to make sure the legs are aligned and the tabletop sits evenly. Also inspect every connection for movement before putting the table into regular use.
Finally, wipe away any remaining dust and inspect the finish for uneven areas or missed spots. Taking a few extra minutes to check the completed piece can make a noticeable difference in both appearance and durability.
How to Care for a Live Edge Console Table
A live edge console table is relatively easy to maintain, but the natural wood should be protected from excessive moisture, heat, and prolonged direct sunlight.
Dust the surface regularly with a soft, dry or slightly damp cloth. Avoid soaking the tabletop or using harsh household cleaners that may damage the finish.
Wipe up spills promptly, especially if the table has an oil- or stain-based finish. Small scratches can often be addressed with light sanding and a compatible finishing product, while deeper damage may require more extensive refinishing.
Wood can also expand and contract as humidity changes. Keeping the table in a reasonably stable indoor environment helps reduce unnecessary movement and keeps the slab looking its best.
Looking for more live edge woodworking projects? Explore these DIY ideas:
DIY live edge dining table
DIY Live Edge Waterfall Table
DIY live edge side table
With the right preparation, a stable base, and routine care, your DIY live edge console table can become a durable statement piece that brings natural wood character to an entryway, hallway, or living space.
Building a DIY live edge waterfall table combines the natural beauty of a wood slab with a seamless waterfall design. With careful planning, accurate miter cuts, and a strong joint, you can create a unique table with continuous wood grain from the tabletop to the leg. This guide covers the key steps from preparing the slab to finishing the table.
How to Build a Live Edge Waterfall Coffee Table
Step 1: Plan Your DIY Live Edge Waterfall Table
Start by deciding the overall dimensions of the table. Determine the desired length and width of the tabletop, along with the final height of the waterfall leg. These measurements will help you identify where the slab needs to be cut.
Next, study the grain pattern carefully. The waterfall effect depends on the grain continuing visually from the tabletop down the side of the table, so the location of the miter cut matters. Avoid choosing a section where the grain changes direction dramatically if a cleaner visual transition is the goal.
Mark the intended cut location and confirm that the remaining sections will provide enough material for both the tabletop and the leg. It is worth checking your measurements several times before cutting because removing additional material later can make it harder to maintain a convincing grain match.
At this stage, think about the overall structure as well. If the table will have another leg or support on the opposite side, plan how it will connect to the tabletop and whether the waterfall joint will need additional reinforcement.
Step 2: Prepare the Live Edge Wood Slab
A stable, clean surface will make the cutting and assembly stages much easier. If the slab is not already flat, level the surface using the method available to you, such as a planer, router sled, or sanding setup.
Once the slab is reasonably flat, inspect it again for cracks, splits, or voids. These natural features can add character to live edge furniture, but loose or deep defects may need to be stabilized before the table is assembled.
Epoxy can be used to fill selected cracks and voids. Seal the underside or edges where necessary before pouring so the epoxy stays in place. After the epoxy has cured, remove the excess and level the repaired area with the surrounding wood.
Do not worry about achieving the final finish at this stage. The goal is to create a stable, workable slab that is ready for accurate layout and cutting.
Looking for more natural wood furniture ideas? Explore our Live edge wood Coffee Table collection for unique grain patterns and organic designs.
Step 3: Cut the Waterfall Miter
This is the most important step in the entire project. The waterfall effect is created by cutting the slab so that one section can be rotated and joined to the tabletop, forming the vertical leg.
Begin by marking the cut carefully and establishing a reliable reference line. A straight, controlled cut is essential because even a small deviation can create a visible gap when the two pieces are joined.
Set the saw to the required 45-degree angle and make the cut gradually. If you are working with a thick slab, multiple controlled passes may be safer and more accurate than trying to remove all of the material in one cut.
After the first section has been cut, prepare the matching piece so the two mitered surfaces can meet to form the waterfall corner. Keep track of the orientation of both pieces throughout the process. Reversing or rotating a section incorrectly can ruin the intended grain alignment.
Before moving forward, place the two sections together without glue and check the fit. Look closely at both the joint and the grain transition. If adjustments are needed, make them carefully and remove as little material as possible.
Step 4: Reinforce and Prepare the Waterfall Joint
Once the mitered pieces fit properly, you can prepare the joint for assembly. A well-cut miter joint can be glued successfully on its own, but additional reinforcement may improve alignment and provide extra confidence in the finished structure.
Depending on your tools and preferred method, you may use dowels, biscuits, splines, or another suitable reinforcement system. These elements can help keep the pieces aligned while clamping and may add support to the joint.
Mark all reinforcement locations carefully before drilling or cutting. Test the alignment of the pieces before applying glue to ensure everything comes together as planned.
A dry fit is especially important at this stage. Assemble the tabletop and waterfall leg without adhesive, then check:
Whether the miter closes cleanly
Whether the tabletop and leg are properly aligned
Whether the grain flows naturally across the joint
Whether the structure sits at the intended angle
Whether your clamping setup can apply pressure where it is needed
Step 5: Assemble Your DIY Live Edge Waterfall Table
Once you are satisfied with the dry fit, prepare the glue and clamps before starting the final assembly. Apply adhesive evenly across both mitered surfaces and install any dowels, biscuits, or other reinforcement you have prepared.
Bring the pieces together carefully and begin applying clamping pressure. The goal is not simply to force the table into a perfect geometric shape. The priority should be achieving a tight, well-aligned joint without introducing gaps.
Use a clamping method that provides pressure directly across the miter. Depending on your setup, temporary clamping blocks or cauls can create better surfaces for the clamps to grip.
Check the alignment as you tighten the clamps. Make sure the two surfaces meet cleanly and the wood grain continues naturally across the corner. Remove excess glue before it fully hardens, then allow the joint to cure completely according to the adhesive manufacturer's instructions.
Step 6: Sand and Refine the Live Edge Table
After the glue has fully cured, remove the clamps and inspect the waterfall joint. Clean away any dried adhesive and refine areas where the surfaces meet.
Begin sanding with a grit appropriate for the condition of the wood, then gradually work toward a finer grit. The goal is to remove machining marks, level minor imperfections, and create a smooth surface without removing the natural character that makes the slab unique.
Pay attention to the live edge as well. Loose bark or unstable material should be removed rather than left in place, as it may eventually separate from the table. However, there is no need to overwork the edge until it looks artificial. The best results usually preserve the natural contours while making the surface safe and durable for everyday use.
Before applying finish, remove all sanding dust from the tabletop, the waterfall leg, and the joint.
Step 7: Finish and Protect the Table
The right finish should enhance the wood while providing protection appropriate for how the table will be used. Consider the level of sheen you want, as well as resistance to moisture, spills, and everyday wear.
It is often helpful to test a finish on an offcut or hidden area first. Different woods can react differently, and the appearance may change significantly depending on the product used.
Apply the finish evenly across the tabletop, the waterfall leg, and the live edges. Follow the recommended drying time between coats, and lightly sand between coats if the product requires it.
Multiple thin coats generally provide better control than one heavy application. Allow the finish enough time to cure before placing heavy objects on the table or using it regularly.
Final Tips for a Successful DIY Live Edge Waterfall Table
A DIY live edge waterfall table is as much about careful preparation as it is about woodworking skill. The most important areas to focus on are the layout, the accuracy of the miter cut, and the fit of the waterfall joint.
Before making the final cut, study the wood grain and confirm how the two sections will align. Before applying glue, dry-fit every component and make sure your clamping method is ready. A few extra minutes spent checking the setup can prevent a major mistake later.
Do not rush the sanding or finishing process either. The natural cracks, curves, and grain patterns of the slab are what give a live edge table its character, so preserve those features while making the surface stable and practical.
Looking for more live edge woodworking projects? Explore these DIY ideas:
DIY live edge dining table
DIY Round Coffee Table
DIY Rectangle Coffee Table
DIY live edge console table
Building a DIY live edge waterfall table is a rewarding way to turn a natural wood slab into a distinctive piece of furniture. With careful slab preparation, accurate miter cuts, a strong waterfall joint, and the right finish, you can create a table that is both durable and visually striking. Take your time with each step, especially measuring and joining the wood, and let the natural grain remain the centerpiece of the design. With the right tools and patience, your finished waterfall table can become a functional statement piece that adds warmth and character to any space.
A DIY live edge dining table is a rewarding way to combine the natural beauty of solid wood with the strength of a custom steel base. From preparing the wood slab and reinforcing the tabletop to building the frame and applying the final finish, each step plays a role in the table's durability and appearance. This guide will show you how to make a live edge dining table that highlights the unique character of the wood while providing a strong, functional surface for everyday use.
What You Need to Build a Live Edge Dining Table
Before starting, prepare the main materials and tools so you can move through the project without unnecessary interruptions.
Materials
The exact quantities will depend on your table size and base design, but you will typically need:
A properly dried live edge wood slab
Steel tubing for the table base
Steel C-channel supports
Steel flat bar for mounting tabs, if needed
Epoxy resin for cracks, voids, and natural inclusions
Screws, bolts, washers, or threaded inserts
Sandpaper in multiple grits
Wood finish suitable for a dining table
Metal primer and paint or another protective steel finish
Mineral spirits or a suitable surface cleaner
Tools
Depending on your design, useful tools may include:
Circular saw or track saw
Jigsaw
Router
Angle grinder
Drill and drill bits
Orbital sander
Chisels
Clamps
Measuring tools
MIG welder or other suitable welding equipment
Welding magnets
Safety equipment
If you enjoy hands-on woodworking projects, you can also try a smaller project for your living room. Check out our DIY Wood Drum Coffee Table guide for inspiration.
How to Build a Live Edge Dining Table with a Steel Base
The basic process can be divided into four main stages: preparing the slab, reinforcing the tabletop, building the base, and finishing the wood.
Step 1: Choose and Prepare the Wood Slab
Start with a slab that is suitable for the size of dining table you want to build. The wood should be sufficiently dry and stable before you begin working with it. A slab with attractive grain and natural edges can create a striking tabletop, but it should also be structurally sound.
Inspect both sides carefully for:
Loose bark
Deep cracks
Natural voids
Weak or unusually thin areas
Damaged sections near the ends
Remove loose bark and unstable material with chisels, a wire brush, or other appropriate tools. Clean dust and debris from any cracks or cavities before filling them.
For larger voids or bark inclusions, epoxy can help stabilize the affected area while preserving the slab's natural appearance. If a crack runs through a weak section of the wood, consider trimming the slab or removing the damaged area rather than relying entirely on filler.
Once the slab is stable, cut it to the desired length and refine the live edges where necessary. Avoid making the edges look too uniform. One of the main appeals of a live edge dining table is the natural shape of the wood.
Step 2: Add C-Channel Supports to the Live Edge Tabletop
A wide or long solid wood slab may benefit from additional support to help maintain its shape over time. Steel C-channels can be recessed into the underside of the tabletop to provide reinforcement without changing the appearance of the top surface.
First, mark the position of each support. Then use a router to create recessed grooves that allow the C-channels to sit flush or nearly flush with the underside of the slab.
The mounting system is especially important. Wood naturally expands and contracts as environmental conditions change, so the supports should not prevent this movement.
Elongated mounting holes are often used to provide flexibility across the width of the tabletop. When installing the hardware, avoid tightening every fastener so aggressively that the slab is locked into a completely fixed position.
The goal is not to force the wood to remain perfectly rigid. Instead, the C-channels should add support while allowing the tabletop to respond naturally to seasonal movement.
Step 3: Build a Steel Base for a Live Edge Dining Table
The steel base should support the weight of the slab while complementing its natural shape. Before cutting the steel, measure the tabletop and determine the final placement of the legs or support structure.
For a custom welded base, begin by cutting the steel tubing to the required dimensions. If the tubing has exposed ends, cap them with matching steel pieces for a cleaner finished appearance.
Assemble the main sections gradually:
Tack weld the steel pieces together.
Check the frame for square and alignment.
Confirm that the base sits level.
Complete the welds once the structure is properly positioned.
Add stretchers or internal supports where additional rigidity is needed.
Checking alignment before fully welding the joints can save significant time later. A small measurement error can cause the finished base to sit unevenly or make it difficult to attach the tabletop correctly.
After welding, grind and smooth the joints as needed. Clean the steel thoroughly before applying primer and paint. A durable metal finish helps protect the base and gives the table a more polished appearance.
Before moving to the finishing stage, place the tabletop on the base temporarily to check the overall proportions. This is the best time to make adjustments to the base position.
Step 4: Sand and Finish the Live Edge Dining Tabletop
Sanding has a major impact on how the wood grain will look after finishing. Start with a grit appropriate for the condition of the slab, then work gradually toward finer grits.
Pay close attention to:
The main tabletop surface
Epoxy-filled areas
Freshly cut edges
Transitions between the flat surface and live edge
The live edge may require more hand sanding because its uneven shape can be difficult to reach with a power sander.
Do not automatically sand to the finest possible grit. Some wood finishes perform best when the surface is prepared within a specific sanding range. Always check the manufacturer's recommendations before applying the final product.
Once the sanding is complete, remove all dust and make sure the wood surface is clean and dry. Apply your chosen finish evenly, following the recommended application and curing process.
After the finish has cured, attach the tabletop to the steel base using appropriate mounting hardware. Screws, washers, mounting tabs, and elongated holes can help secure the top while still allowing for natural wood movement.
If you want to craft your own furniture for your home, check out this guide on DIY live edge coffee table ideas for creating a natural, one of a kind piece.
Common Mistakes to Avoid When Making a Live Edge Dining Table
A DIY live edge dining table can look simple when finished, but several mistakes can affect its appearance and durability.
Choosing an unstable slab
A beautiful slab is not always a good tabletop. Check for excessive cracking, loose bark, weak sections, and major structural defects before committing to the project.
Filling problems without proper preparation
Epoxy should not be used as a shortcut for every issue. Remove loose material and clean cracks or voids before applying resin to improve the stability of the repair.
Ignoring natural wood movement
Solid wood changes with humidity. A mounting system that holds the tabletop too rigidly can create unnecessary stress and increase the risk of cracking or warping.
Installing C-channels without room for movement
C-channel supports can reinforce a large slab, but they should be installed with an appropriate fastening system. The support should strengthen the tabletop without completely preventing natural expansion and contraction.
Skipping alignment checks when building the steel base
Always check for square and level before completing your welds. Correcting a crooked base after the steel is fully welded is far more difficult.
Sanding beyond what the finish requires
A smoother surface is not always better. Sanding too finely can affect how some finishes bond with the wood, so follow the preparation guidelines for your specific product.
With careful planning and attention to these details, a DIY live edge dining table with a steel base can become a durable and distinctive centerpiece for your dining space. The combination of natural wood and steel creates a design that feels both organic and structurally strong, while allowing the character of the slab to remain the focal point.
A live edge coffee table already has a distinctive look, but adding too much decor can easily hide its natural edge and beautiful wood grain. The key is to choose the right accents and arrange them thoughtfully, creating a stylish space while letting the wood remain the focal point. Here are some simple and effective ways to style a live edge coffee table.
Live Edge Coffee Table Styling Ideas
Styling a live edge coffee table is all about balance. Start with a few functional or decorative pieces, then build around them while leaving enough of the tabletop visible to appreciate its unique shape and grain.
Style With a Decorative Tray
A decorative tray is one of the easiest ways to create a neat, intentional arrangement. It gives smaller items a defined place while making the entire tabletop look more organized.
Choose a tray that complements the wood rather than competing with it. Natural wood, ceramic, metal, or woven trays can all work well depending on your interior style.
Place a few essentials inside, such as a candle, small vase, or remote controls. For a live edge coffee table, avoid using an oversized tray that covers too much of the natural edge.
Add Coffee Table Books
A small stack of coffee table books adds height and personality without making the table feel overly decorated. Choose books with attractive covers that coordinate with the room's color palette.
Two or three books are usually enough. You can place a small decorative object, vase, or candle on top to create a simple layered arrangement.
For darker woods such as walnut, lighter-colored book covers can create a pleasant contrast. With lighter woods, neutral or earthy tones can maintain a softer, more natural look.
Add Greenery
Greenery pairs naturally with a live edge coffee table because both bring an organic element into the room. A small potted plant, vase of fresh flowers, or a few dried branches can add color and softness without taking attention away from the wood.
For a more relaxed look, try a simple ceramic vase with seasonal branches. If you prefer low-maintenance decor, dried flowers or preserved greenery can provide a similar effect.
Keep the arrangement proportional to the table. A small plant often works better than a large centerpiece that blocks the view across the tabletop.
Use Candles
Candles are an easy way to add warmth and atmosphere to your coffee table. Pair one or two candles with simple decorative objects such as a ceramic vase, sculptural piece, stone accent, or small wooden ornament.
The goal is to create visual interest without turning the table into a display shelf. If your live edge coffee table has a particularly striking grain pattern, choose understated accessories so the wood remains the focal point.
Mix Heights and Textures
A flat arrangement can make even beautiful decor look uninspiring. Instead, combine objects with different heights and textures to create a more dynamic display.
For example, you could pair a stack of books with a medium-height vase and a small candle. Then introduce contrasting materials such as ceramic, glass, linen, metal, or woven fibers.
This layered approach adds depth while keeping the styling natural. Just make sure the different elements still feel connected through color, material, or shape.
Keep the Styling Minimal
When it comes to a live edge coffee table, less is often more. The natural edge and distinctive wood grain already provide plenty of visual interest, so there is no need to cover the entire surface with accessories.
A simple arrangement of a tray, books, and greenery can be enough. Leave some open space around the decor so the organic shape of the tabletop remains visible.
This is especially important for highly figured woods or tables with an unusually shaped live edge. Let the wood do some of the decorating for you.
See more coffee table decor ideas:
How To Decorate A Rectangle Coffee Table: An Ultimate Guide
Square Coffee Table Decor Ideas: 5 Layouts That Transform Your Space
How to Decorate an Oval Coffee Table: 15 Modern Styling Ideas for Your Home
What Not to Put on a Live Edge Coffee Table
Good styling is not only about what you add but also what you leave out. Avoid placing too many decorative objects on the table, as a crowded arrangement can hide the natural character that makes a live edge table special.
It's also best to avoid oversized decor that dominates the tabletop or blocks the view across the room. Too many competing colors and materials can make the arrangement feel disconnected, while overly small objects may simply look scattered.
Most importantly, don't cover the live edge or the most attractive parts of the wood grain. Leave enough open space for the natural shape and texture of the table to remain the main feature.
A simple formula works well: choose one main piece, add a few supporting accents, and leave plenty of breathing room. Whether you prefer a modern, rustic, or minimalist interior, this approach lets your live edge coffee table look stylish while still feeling natural and functional.