 Skip to content
Your cart (0)
Your cart is empty
Tax included and shipping calculated at checkout
Recommended products




Drawer menu
Tax included and shipping calculated at checkout
Your wishlist is empty.
Continue shopping


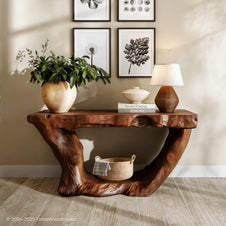
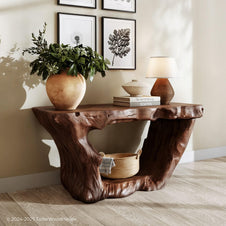
A DIY live edge console table is a great way to turn a natural wood slab into a functional piece of furniture with plenty of character. The irregular edge, visible grain, and unique shape of the wood make every table different.
The project is relatively straightforward when you break it into a few key stages: preparing the slab, sanding and finishing the wood, building the legs, and securing everything together. With accurate measurements and careful assembly, you can create a console table that works beautifully in an entryway, hallway, or behind a sofa.
Before starting, gather the materials and tools needed for both the woodwork and assembly.
Materials:
Tools:

Looking for more live edge furniture inspiration? Explore our Live edge Coffee Table wood options to find beautiful wood types and natural grain patterns for your next project.
Start by inspecting the slab and deciding which areas you want to keep as part of the natural live edge. The goal is to remove unnecessary material without losing the organic character that makes the tabletop distinctive.
Use a straightedge to establish clean reference lines where the ends need to be squared. Once the layout is marked, carefully trim the ends with a circular saw or track saw. Make sure the slab is securely supported before cutting.
Take your time during this stage. A console table does not need a perfectly uniform outline, but the ends and mounting areas should be accurate enough to make assembly straightforward.
If the slab has cracks, loose bark, or unstable sections, address them before moving on. A stable tabletop will make the later sanding and assembly stages much easier.

Once the tabletop has been cut to shape, begin sanding to smooth the surface and prepare it for finishing.
For rough areas, start with a coarser grit and gradually move to finer sandpaper. A belt sander can help level particularly uneven sections, while a random orbital sander is better suited to refining the surface and removing visible sanding marks.
Pay special attention to the live edge. Sand it enough to remove loose fibers and sharp spots, but avoid over-shaping it. The irregular profile is part of the table's character.
After sanding, remove all dust before applying a finish. If you're working with a wood species that tends to absorb stain unevenly, a pre-stain conditioner can help create a more consistent color.
You can then apply a wood stain for a darker appearance or choose a clear finish if you want the natural grain and color to remain visible. Follow the manufacturer's drying and recoat instructions rather than rushing the finishing process.

The legs should complement the proportions of the tabletop while providing enough support for everyday use.
If you're building wooden legs from 2×4 lumber, measure and cut the pieces according to your desired table height and leg design. A simple rectangular frame can be made by combining longer vertical pieces with shorter horizontal sections.
Before assembling anything, dry-fit the pieces to confirm that the dimensions match. This is also a good time to sand the components, especially the edges and corners that will remain visible.
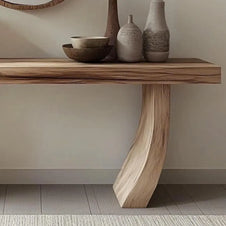
For a modern look, the wooden legs can be painted black to create the appearance of a simple metal-style base. Alternatively, you can use a natural wood finish to create a more cohesive all-wood console table.

Once the legs are assembled and finished, position the tabletop upside down on a protected work surface.
Measure from the edges to determine where the legs should sit. Keep the placement symmetrical and leave enough space around the mounting points to avoid putting unnecessary stress on the slab.
Pre-drill the attachment holes before driving in the screws. This is especially important when working near the ends of a solid wood slab because it can reduce the risk of splitting.
Pocket holes can also be useful when constructing wooden leg frames. If you use them, position the holes on less visible surfaces so the finished table maintains a clean appearance.
Use appropriate screws for the thickness and construction of the tabletop. Avoid overtightening the fasteners, since solid wood can move naturally with changes in humidity.

With the legs attached, carefully turn the console table upright and check its stability.
Place the table on a level surface and look for any rocking or uneven contact. If necessary, make small adjustments to the legs or add suitable leveling pads underneath them.
Check the table from several angles to make sure the legs are aligned and the tabletop sits evenly. Also inspect every connection for movement before putting the table into regular use.
Finally, wipe away any remaining dust and inspect the finish for uneven areas or missed spots. Taking a few extra minutes to check the completed piece can make a noticeable difference in both appearance and durability.

A live edge console table is relatively easy to maintain, but the natural wood should be protected from excessive moisture, heat, and prolonged direct sunlight.
Dust the surface regularly with a soft, dry or slightly damp cloth. Avoid soaking the tabletop or using harsh household cleaners that may damage the finish.
Wipe up spills promptly, especially if the table has an oil- or stain-based finish. Small scratches can often be addressed with light sanding and a compatible finishing product, while deeper damage may require more extensive refinishing.
Wood can also expand and contract as humidity changes. Keeping the table in a reasonably stable indoor environment helps reduce unnecessary movement and keeps the slab looking its best.

Looking for more live edge woodworking projects? Explore these DIY ideas:
With the right preparation, a stable base, and routine care, your DIY live edge console table can become a durable statement piece that brings natural wood character to an entryway, hallway, or living space.


