 Skip to content
Your cart (0)
Your cart is empty
Tax included and shipping calculated at checkout
Recommended products




Drawer menu
Tax included and shipping calculated at checkout
Your wishlist is empty.
Continue shopping


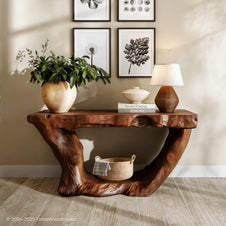
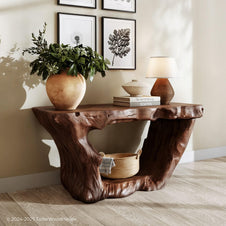
Building a DIY live edge waterfall table combines the natural beauty of a wood slab with a seamless waterfall design. With careful planning, accurate miter cuts, and a strong joint, you can create a unique table with continuous wood grain from the tabletop to the leg. This guide covers the key steps from preparing the slab to finishing the table.
Start by deciding the overall dimensions of the table. Determine the desired length and width of the tabletop, along with the final height of the waterfall leg. These measurements will help you identify where the slab needs to be cut.
Next, study the grain pattern carefully. The waterfall effect depends on the grain continuing visually from the tabletop down the side of the table, so the location of the miter cut matters. Avoid choosing a section where the grain changes direction dramatically if a cleaner visual transition is the goal.
Mark the intended cut location and confirm that the remaining sections will provide enough material for both the tabletop and the leg. It is worth checking your measurements several times before cutting because removing additional material later can make it harder to maintain a convincing grain match.
At this stage, think about the overall structure as well. If the table will have another leg or support on the opposite side, plan how it will connect to the tabletop and whether the waterfall joint will need additional reinforcement.

A stable, clean surface will make the cutting and assembly stages much easier. If the slab is not already flat, level the surface using the method available to you, such as a planer, router sled, or sanding setup.
Once the slab is reasonably flat, inspect it again for cracks, splits, or voids. These natural features can add character to live edge furniture, but loose or deep defects may need to be stabilized before the table is assembled.
Epoxy can be used to fill selected cracks and voids. Seal the underside or edges where necessary before pouring so the epoxy stays in place. After the epoxy has cured, remove the excess and level the repaired area with the surrounding wood.
Do not worry about achieving the final finish at this stage. The goal is to create a stable, workable slab that is ready for accurate layout and cutting.

Looking for more natural wood furniture ideas? Explore our Live edge wood Coffee Table collection for unique grain patterns and organic designs.
This is the most important step in the entire project. The waterfall effect is created by cutting the slab so that one section can be rotated and joined to the tabletop, forming the vertical leg.
Begin by marking the cut carefully and establishing a reliable reference line. A straight, controlled cut is essential because even a small deviation can create a visible gap when the two pieces are joined.
Set the saw to the required 45-degree angle and make the cut gradually. If you are working with a thick slab, multiple controlled passes may be safer and more accurate than trying to remove all of the material in one cut.
After the first section has been cut, prepare the matching piece so the two mitered surfaces can meet to form the waterfall corner. Keep track of the orientation of both pieces throughout the process. Reversing or rotating a section incorrectly can ruin the intended grain alignment.
Before moving forward, place the two sections together without glue and check the fit. Look closely at both the joint and the grain transition. If adjustments are needed, make them carefully and remove as little material as possible.

Once the mitered pieces fit properly, you can prepare the joint for assembly. A well-cut miter joint can be glued successfully on its own, but additional reinforcement may improve alignment and provide extra confidence in the finished structure.
Depending on your tools and preferred method, you may use dowels, biscuits, splines, or another suitable reinforcement system. These elements can help keep the pieces aligned while clamping and may add support to the joint.
Mark all reinforcement locations carefully before drilling or cutting. Test the alignment of the pieces before applying glue to ensure everything comes together as planned.
A dry fit is especially important at this stage. Assemble the tabletop and waterfall leg without adhesive, then check:

Once you are satisfied with the dry fit, prepare the glue and clamps before starting the final assembly. Apply adhesive evenly across both mitered surfaces and install any dowels, biscuits, or other reinforcement you have prepared.
Bring the pieces together carefully and begin applying clamping pressure. The goal is not simply to force the table into a perfect geometric shape. The priority should be achieving a tight, well-aligned joint without introducing gaps.
Use a clamping method that provides pressure directly across the miter. Depending on your setup, temporary clamping blocks or cauls can create better surfaces for the clamps to grip.
Check the alignment as you tighten the clamps. Make sure the two surfaces meet cleanly and the wood grain continues naturally across the corner. Remove excess glue before it fully hardens, then allow the joint to cure completely according to the adhesive manufacturer's instructions.

After the glue has fully cured, remove the clamps and inspect the waterfall joint. Clean away any dried adhesive and refine areas where the surfaces meet.
Begin sanding with a grit appropriate for the condition of the wood, then gradually work toward a finer grit. The goal is to remove machining marks, level minor imperfections, and create a smooth surface without removing the natural character that makes the slab unique.
Pay attention to the live edge as well. Loose bark or unstable material should be removed rather than left in place, as it may eventually separate from the table. However, there is no need to overwork the edge until it looks artificial. The best results usually preserve the natural contours while making the surface safe and durable for everyday use.
Before applying finish, remove all sanding dust from the tabletop, the waterfall leg, and the joint.

The right finish should enhance the wood while providing protection appropriate for how the table will be used. Consider the level of sheen you want, as well as resistance to moisture, spills, and everyday wear.
It is often helpful to test a finish on an offcut or hidden area first. Different woods can react differently, and the appearance may change significantly depending on the product used.
Apply the finish evenly across the tabletop, the waterfall leg, and the live edges. Follow the recommended drying time between coats, and lightly sand between coats if the product requires it.
Multiple thin coats generally provide better control than one heavy application. Allow the finish enough time to cure before placing heavy objects on the table or using it regularly.

A DIY live edge waterfall table is as much about careful preparation as it is about woodworking skill. The most important areas to focus on are the layout, the accuracy of the miter cut, and the fit of the waterfall joint.
Before making the final cut, study the wood grain and confirm how the two sections will align. Before applying glue, dry-fit every component and make sure your clamping method is ready. A few extra minutes spent checking the setup can prevent a major mistake later.
Do not rush the sanding or finishing process either. The natural cracks, curves, and grain patterns of the slab are what give a live edge table its character, so preserve those features while making the surface stable and practical.
Looking for more live edge woodworking projects? Explore these DIY ideas:
Building a DIY live edge waterfall table is a rewarding way to turn a natural wood slab into a distinctive piece of furniture. With careful slab preparation, accurate miter cuts, a strong waterfall joint, and the right finish, you can create a table that is both durable and visually striking. Take your time with each step, especially measuring and joining the wood, and let the natural grain remain the centerpiece of the design. With the right tools and patience, your finished waterfall table can become a functional statement piece that adds warmth and character to any space.


