 Skip to content
Your cart (0)
Your cart is empty
Tax included and shipping calculated at checkout
Recommended products

Drawer menu
Tax included and shipping calculated at checkout
Your wishlist is empty.
Continue shopping


At TailorWoodHaven, we're dedicated to delivering handcrafted furniture that brings warmth and character to your space. Here's what you need to know:
We proudly offer free worldwide shipping to most regions, including the U.S., Canada, and the EU. Orders are delivered via trusted carriers like UPS, FedEx, and DHL.
Because our furniture is handmade to order, returns are only accepted if we made an error.
In the package: carved wood wall art panel, French cleat (two parts), screws, and wall plugs
Via email: a step-by-step installation video guide
Drill, Screwdriver, Level, Pencil, Measuring tape, Stud finder (recommended), Hammer (for wall plugs if needed)
Step 1 – Mark the Wall
Decide where you want to hang the wall art. Use a stud finder to locate studs if possible for maximum support. Hold the wall cleat (the piece that attaches to the wall) against the wall at the desired height. Use a level to ensure it is straight, then mark the screw holes with a pencil.
Step 2 – Attach the Wall Cleat
Drill pilot holes into the wall at the marked points. If you are not drilling into studs, insert wall plugs to provide additional grip. Position the cleat and secure it to the wall using the provided screws. Double-check with the level to confirm it is perfectly straight.
Step 3 – Attach the Panel Cleat
Turn the wooden wall art panel face down on a soft surface. Locate the matching cleat and align it across the top back of the panel. Secure it with the provided screws, ensuring it is centered and level. The angled edge should face downward so it interlocks with the wall-mounted cleat.
Step 4 – Mount the Wall Art
Lift the panel carefully and position it above the wall cleat. Lower it slowly until the two cleats interlock securely. Check that the panel sits flush against the wall and is stable.
Step 5 – Final Check
Step back and make sure the artwork is level and positioned correctly. Make small adjustments as needed. Once in place, your carved wood wall art is securely mounted and ready to enhance your space.
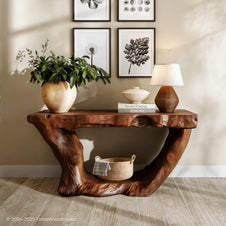
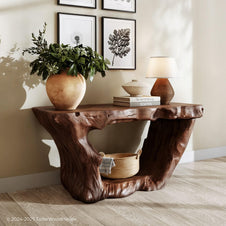
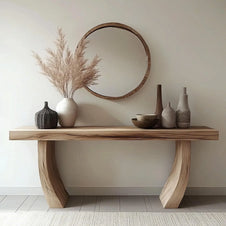
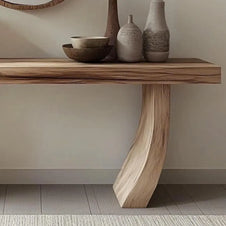
For large or non-solid pieces like tree bookshelves, console tables..., the final product will be crafted in modular sections with seamless wooden joints to ensure both easy assembly and visual continuity. This may not apply to floating shelves or solid-slab tables
Each item is made individually by hand, and natural wood variations ensure that no two pieces are exactly alike. We will send you progress updates with images during the crafting process and only ship with your approval
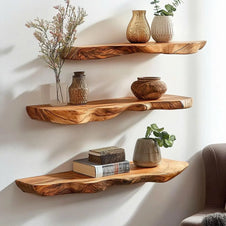
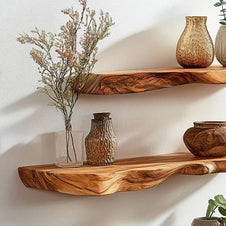
Prices listed for floating shelves refer to individual units only — not sets, unless otherwise specified
"Andrew and the team worked through several conversations and pictures to make the mantel and console table meet my vision in design and color. I will order from them again."

"From the first contact till the final shelf on the wall I’m very happy. I’ve been in touch with Andrew during the whole process and we discussed and adjusted the details to my full satisfaction!!! Everything thing was securely packed and arrived without any issues. I love my shelf :)"

"VERY VERY GOOD. And still those words don’t describe how excellent he was"

"Gorgeous console table that looks absolutely stunning in my entryway. It’s quirky and different, but also graceful and unobtrusive, so it goes nicely with the rest of the room. I couldn’t be happier with the quality, feel, color, and shape. Also, the customer service was excellent. They had no trouble working with me to adjust the design around my oddly placed floor vent and outlet. Design, creation and shipping were all super fast."

"A very pleasant experience. I love how they look and would definitely purchase from this seller again."

"This product is amazing! It is beautiful and the customer service was outstanding with great communication and fast shipping. I think these floating shelves are really gorgeous and I highly recommend this new shop! Thanks guys."
"A very responsive and kind seller who deeply cares about the customer. The item is beautiful and well crafted!"

Due to the natural variations in wood grain, color, and texture, and craftmanship, finished product will look approximately 90% like the design. Don’t worry, we’ll keep you up to date in every production stage, from shaping to painting to ensure that you’re satisfied with the product before receiving it
Absolutely! Most of our furniture is screw-free. For items like floating shelves or tree bookshelf, you’ll only need to wall-mount the bracket — a simple process we guide you through with step-by-step instructions included in our email
We primarily use South American Walnut — a richly grained hardwood with natural durability and rustic charm. Each piece showcases unique patterns that make your furniture truly one-of-a-kind
Absolutely! Custom work is one of our specialties. Just send us your vision, dimensions, or reference photos — and we’ll work closely with you to bring your idea to life, tailored perfectly to your space and preferences
Yes, we do have a return and refund policy. Please refer to the full details here.
Yes, we ship internationally by collaborating with leading couriers (UPS, FedEx, and DHL) to ensure fast and secure delivery. The arrival time will depends on your location and the nature of your order, but please see the estimated time here


