Your cart (0)
Your cart is empty
Tax included and shipping calculated at checkout
Recommended products


Drawer menu
Tax included and shipping calculated at checkout
Your wishlist is empty.
Continue shopping


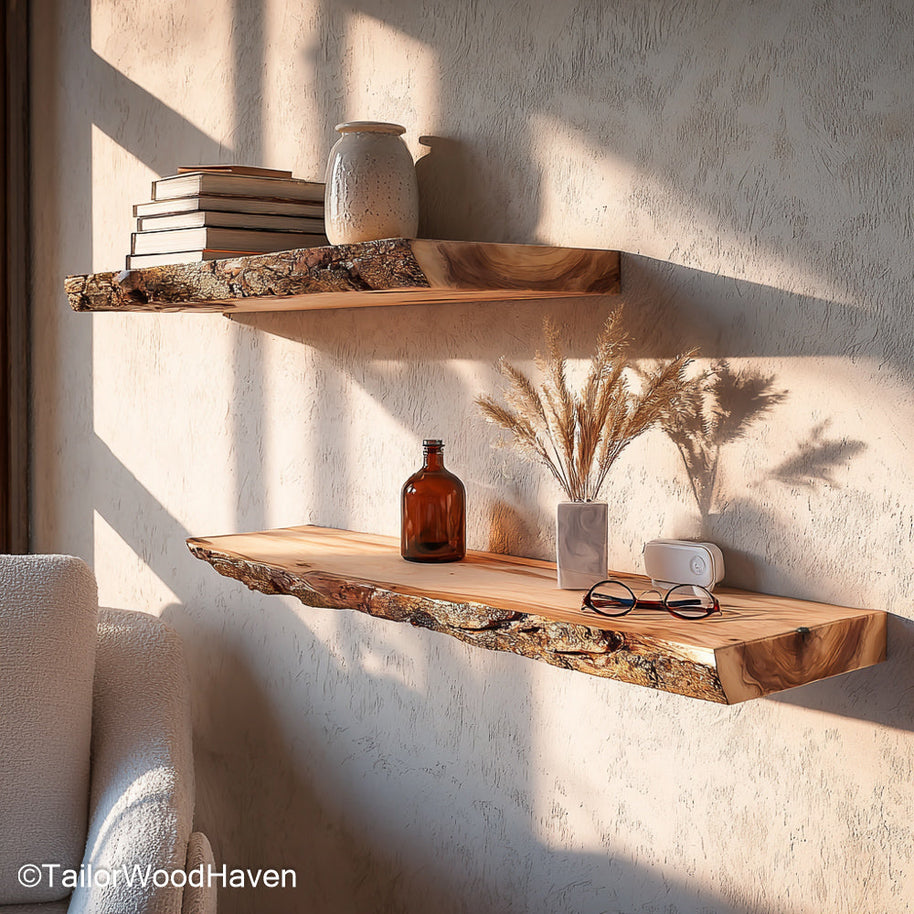
Staggering floating shelves is a modern trend that transforms a plain wall into an asymmetrical, artistic focal point. This dynamic look requires careful planning and precision to ensure balance without chaos. This guide will show you exactly how to stagger floating shelves, covering the critical steps of design, securing, and styling. By the end, you'll have mastered how to stagger floating shelves to create a stunning, custom feature in any room.
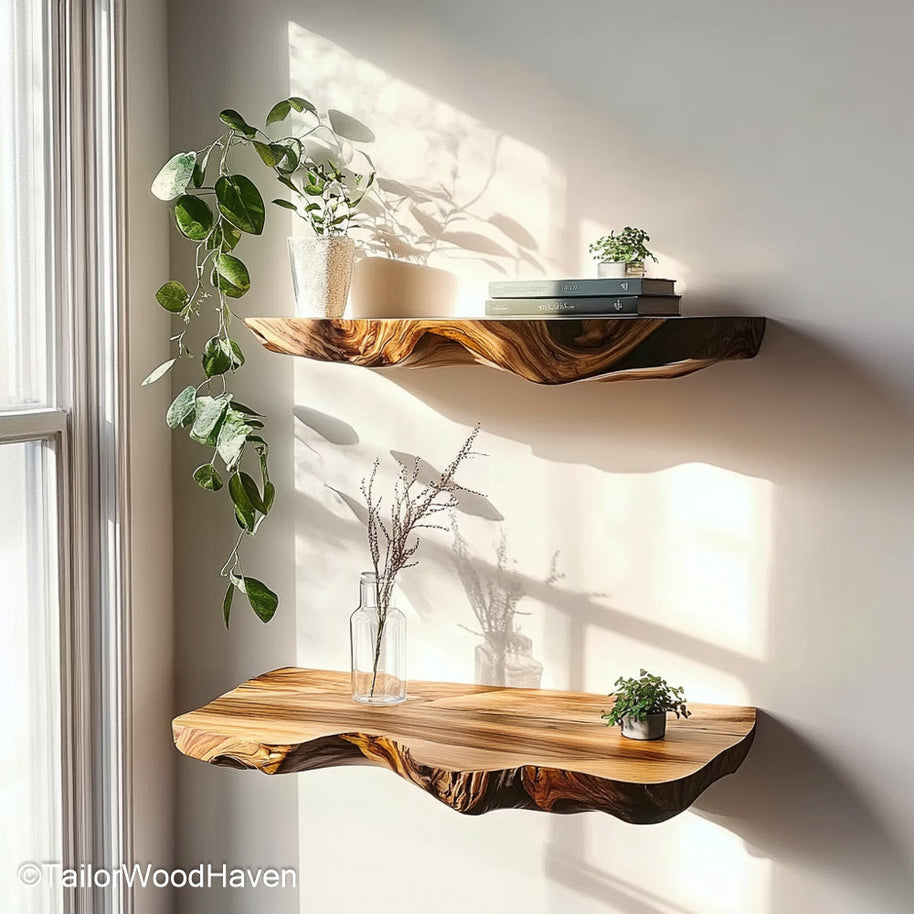
A staggered arrangement is a deliberate design choice that is superior to standard layouts. To learn how to stagger floating shelves like an interior designer, understand these key benefits: the uneven placement immediately adds visual interest and texture, breaking up a flat wall. This layout naturally creates a focal point, giving your room a modern, artistic, and gallery-like feel. Additionally, staggering allows for highly flexible use, letting you combine shelves of different sizes to fit various items perfectly.
To perfectly anchor your artistic vision, choose our floating live edge shelves, which provide the strength and timeless quality your modern, staggered display deserves.
To ensure a professional look when learning how to stagger floating shelves, focus on these critical planning rules:
Vertical Spacing: Maintain 12–18 inches of consistent space between shelves to prevent a cluttered look.
Horizontal Offset: Shift each shelf by one-third to one-half the length of the shorter shelf to achieve a visually balanced staggered effect.
Eye-Level Guideline: Center your entire display approximately 56–60 inches from the floor for comfortable, easy viewing.
Clearances: Always check that your layout does not block doors, windows, light switches, or kitchen faucets.
Remember, careful attention to these guidelines is the most critical step to ensure your staggered shelves look intentional, not accidental.
Essential Tools for Installation
Having the right tools is crucial for successfully learning how to stagger floating shelves with precision. Here are the essential items mentioned in the installation guide that you'll need before you begin drilling:
Stud Finder
Tape Measure
Pencil
Level
Painter's Tape or Paper Templates
Drill & Drill Bits
Heavy-Duty Fasteners
Micro Shims (Small, thin pieces of material used for final alignment to correct any minor tilt or wobble)
Follow this sequence precisely to ensure your staggered layout is mounted perfectly level and stable. This instruction set is the most valuable part of learning how to stagger floating shelves.
This is the most crucial preparation step. Do not use a pencil directly on the wall. Instead, cut pieces of painter’s tape or paper templates to the exact dimensions of your shelves. Tape these templates to the wall according to your pre-planned layout. Use a laser level or a long-arm spirit level to confirm that all the top and bottom lines of your templates are perfectly horizontal. Step back frequently to view the full staggered arrangement from a distance before moving to the next step of how to stagger floating shelves.
With your templates secured, use a stud finder to locate the wooden studs behind the drywall within the area of each shelf template. Mark the center of the studs. Next, place your shelf bracket against the wall and mark the exact points where the bracket bolts will enter the wall, ensuring they line up with the center of the studs. This process must be repeated for every single shelf in your staggered layout.
Install your shelves methodically by completing one shelf at a time. Begin by drilling pilot holes at your marked points. Next, secure the bracket to the wall using heavy-duty fasteners, ensuring you check the bracket with a level before tightening it completely. Once the bracket is secure, simply slide the shelf onto it to complete the first shelf.
Repeat this process in sequence - from the top-most shelf down is often easiest - to maintain consistent spacing across your entire staggered display. A solid understanding of how to stagger floating shelves requires careful attention to detail at this stage.
Once all shelves are mounted, small imperfections may still be present. Use micro shims (thin pieces of plastic or wood) hidden behind the bracket plates to correct any slight unevenness, ensuring every shelf is perfectly level. If your hardware uses set screws, tighten them now to lock the shelf onto the bracket. Finally, perform a load test by applying gentle pressure to confirm the stability of the entire staggered set before moving on to styling.
By following these careful steps, you make sure your wall stays strong, and your floating shelves will be safe, stable, and perfectly level.
The application of how to stagger floating shelves varies depending on the room's function and typical viewing distance.
Staggered shelves are highly effective over a sofa or a media console. Here, the visual gap between shelves should be larger (16–20 inches) to accommodate larger decorative items. Balance is key: use larger anchor pieces (like framed art) on one shelf and counterbalance the weight with a collection of smaller items and plants on the offset shelf.
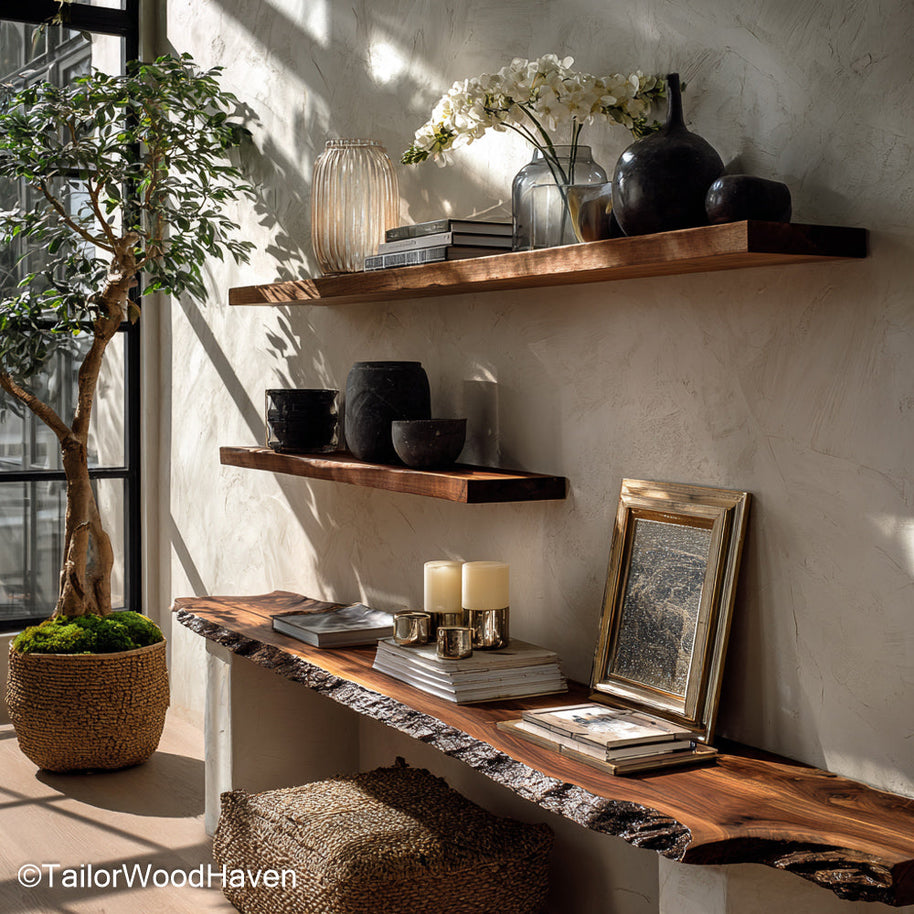
Elevate your staggered arrangement instantly: rustic floating shelves bring genuine, one-of-a-kind texture to your wall, making them the perfect artistic element to balance your large framed art and collections.
In the kitchen, staggered shelves are usually placed between existing cabinets. Since the space is often smaller and the items more uniform, the staggering can be more subtle. Focus on functionality: one shelf might be wide enough to safely hold plates and mugs, while the offset shelf can hold cookbooks and small herbs. Safety is paramount when learning how to stagger floating shelves in a high-traffic area.
Bathroom shelving is usually placed over the toilet or vanity. Since space is limited, the shelves should be shallow in depth (6–8 inches). Staggering here is highly practical: it gives a spot for tall items like sprays or brushes without wasting vertical space on a lower shelf.
These areas require a highly functional and narrow solution. For these areas, a specific strategy is needed when learning how to stagger floating shelves. Use shallow depth shelves (4–6 inches) and stick to a simple zigzag pattern to keep the path clear. This minimizes the space used while creating a perfect drop zone for keys or mail.
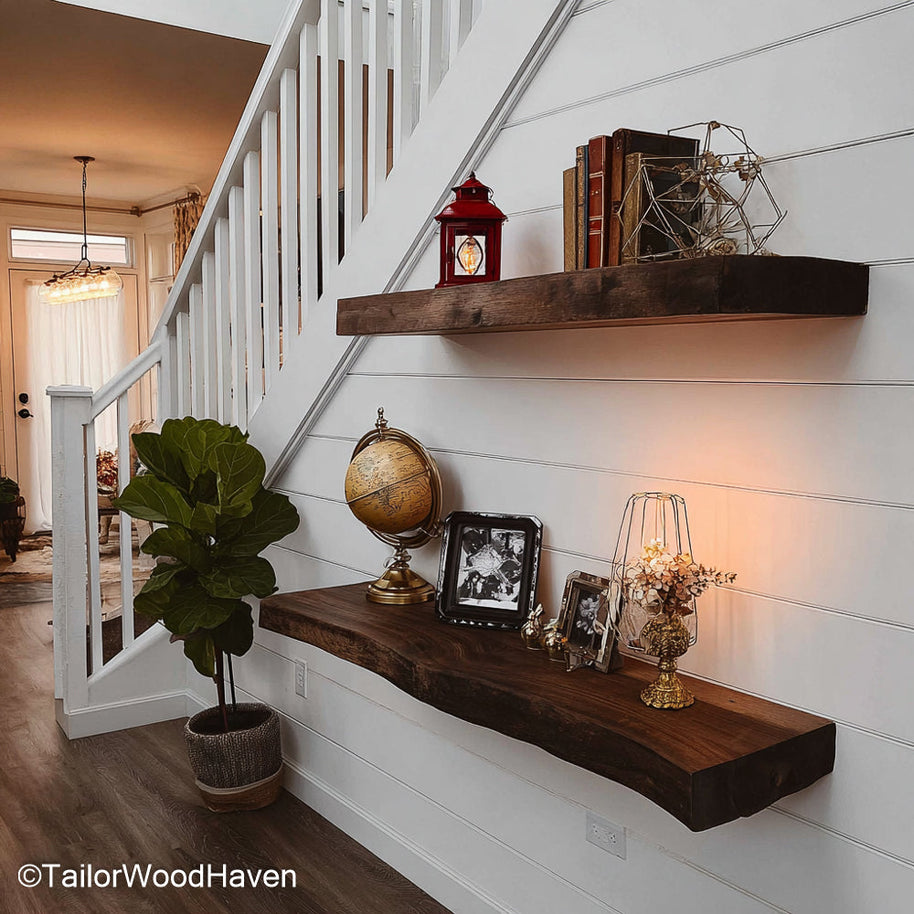
Even for a shallow drop zone, our rich walnut floating shelves offer the perfect marriage of narrow functionality and upscale elegance, instantly elevating your entryway or hallway.
Successfully mastering how to stagger floating shelves means anticipating and preventing these common pitfalls:
Overloading: Staggered shelves often look better with fewer items. Don't put too many items on the shelves; this will ruin the clean, artistic look and make the display seem cluttered, undermining the initial design intent.
Wrong Hardware: Not using the right fasteners for the wall type (e.g., drywall anchors instead of lag bolts into studs) can lead to a sagging or catastrophic shelf failure. Always secure into studs for heavy-duty support.
Ignoring the Big Picture: Don't get so focused on leveling one shelf that you forget to step back and look at the entire layout. The most common error in how to stagger floating shelves is having a perfectly level shelf that is positioned incorrectly in the overall arrangement.
Forgetting to Level: This seems simple, but a shelf that is not perfectly level will immediately ruin the entire clean look and draw attention away from the beautiful stagger. Use a level for every step of the installation process.
Once the physical installation is complete, the final step in learning how to stagger floating shelves is decorating them to enhance the asymmetrical design. For more ideas on decorating floating shelves, you should find inspiration on Pinterest.
Anchor and Triangle: Start with your largest "anchor" pieces, using odd-number groupings (3 or 5). Arrange them to create an imaginary triangle across the whole display to draw the eye.
Vary Elements: Mix heights, textures, and colors (such as tall vases next to short books) to ensure your display looks cohesive, not uniform.
Smart Weight Distribution: For shelf longevity, place all heavier items directly over the internal brackets where the shelf is strongest.
Easy Refresh: This style is simple to update! By mastering how to stagger floating shelves, you can easily swap out small, seasonal elements for an entirely new look.
Figuring out how to stagger floating shelves is a great way to add a custom, dynamic, and modern look to your home. The key to this project is recognizing that the aesthetic success relies on precision in the planning phase, not just the physical installation. By taking the time to plan your layout according to proper measurements and making sure each shelf is mounted with absolute precision, you can create a unique focal point that is both functional and stylish. Mastering how to stagger floating shelves ensures that your finished wall is a source of pride and an instant conversation starter


