Your cart (0)
Your cart is empty
Tax included and shipping calculated at checkout
Recommended products


Drawer menu
Tax included and shipping calculated at checkout
Your wishlist is empty.
Continue shopping


Creating your own floating shelves is a fantastic way to add a personalized touch to your home, but a live edge floating shelves diy project transforms a simple shelving unit into a unique piece of functional art.
Before you can begin to build your beautiful new shelf, you need to gather the right materials and tools.
Making the right choices here will save you a lot of time and effort down the line and ensure a successful live edge floating shelves diy project.
The wood slab is the heart of your project, and selecting the right one is a decision that will define the final aesthetic.
When tackling a live edge floating shelves diy, you can choose between a solid slab and reclaimed wood, each with its own benefits.
Solid Slabs: These are a fantastic option if you want a clean, uninterrupted grain pattern. Common choices include walnut, oak, and maple.
Walnut: Prized for its rich, dark color and dramatic, swirling grain patterns. It offers a luxurious, high-end feel.
Oak: A durable and timeless wood with a prominent, open grain. It's perfect for a classic, robust look.
Maple: Known for its light, bright color and fine grain. Maple is an excellent choice if you want a modern, clean, and airy aesthetic.
Reclaimed Wood:
This type of wood has a history and unique character from its past life, which adds depth to your live edge floating shelves diy.
Reclaimed barn wood or slabs from fallen trees often have beautiful imperfections, knots, and a weathered patina that can't be replicated.
While it may require more preparation to remove old nails or debris, the end result is a truly one-of-a-kind shelf.
Having the correct tools makes all the difference in achieving a professional finish for your live edge floating shelves diy.
|
Tool |
Purpose |
|
Saw |
To cut the wood to your desired length. |
|
Router or Planer |
To flatten the wood's surface. |
|
Sander |
With various grits to smooth the surface. |
|
Chisel or Small Router |
To carve the channel for the hidden brackets. |
|
Drill |
To mount the brackets to the wall. |
|
Tape Measure and Level |
For accurate and straight installation. |
|
Epoxy Resin (Optional) |
To fill any natural cracks in the wood. |
|
Oil or Varnish |
To protect and finish the wood. |
This is where the magic happens. Turning a rough slab of wood into a finished, ready-to-mount shelf requires patience and attention to detail.
The first step is to get your slab to the right dimensions and ensure it’s perfectly flat.
Cut to Length: Using a circular saw or miter saw, carefully cut your slab to the desired length. Measure twice, cut once!
Flatten the Surface:
If your slab is not perfectly flat, you can use a router with a flattening jig to systematically level the top and bottom surfaces.
This process removes any high spots, creating a uniform thickness across the entire piece. For a truly professional live edge floating shelves diy project, flattening the slab is a non-negotiable step.
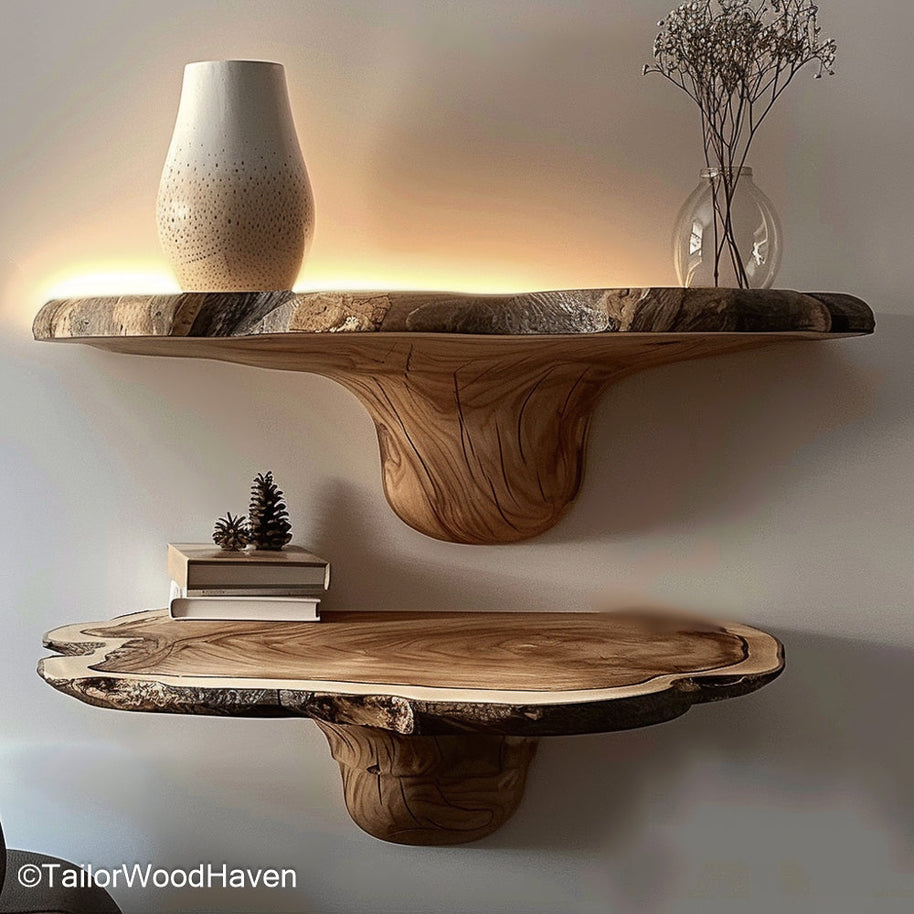
These functional floating shelves come complete with robust brackets for stable, easy wall mounting in any kitchen or office setting.
The "live edge" is the defining feature of your shelf, so you want to prepare it while maintaining its natural form. The goal is to smooth the edges without removing their unique character.
Remove Bark: If your wood slab still has bark, gently remove it with a chisel or a stiff wire brush. Be careful not to damage the underlying wood.
Sanding the Edges:
Use a lower-grit sandpaper (around 120) to smooth the live edge just enough to remove splinters and rough spots.
Then, finish with a higher grit (220) to create a soft, safe-to-touch edge while preserving the natural imperfections and contours.
This process makes your live edge floating shelves diy both beautiful and user-friendly.
This is one of the most critical steps in any live edge floating shelves diy project. The I Spy DIY tutorial is a great resource for understanding this process. You'll need to create a secure channel on the back of the shelf to house the bracket.
Mark the Channel:
Lay your shelf face down and mark a perfectly straight line on the back where your bracket will sit. The channel should be slightly wider and deeper than the bracket's mounting arms.
Rout the Channel:
Using a router, carefully carve out the marked channel. Make several shallow passes to avoid burning the wood and to achieve a clean, precise fit. The bracket should slide into the channel snugly.
A beautiful shelf is useless if it falls off the wall. Proper installation is key to ensuring your live edge floating shelves diy are secure and safe to use.
Your choice of mounting hardware depends on what's behind your wall.
Stud Mounting:
Whenever possible, mount your shelf into at least one wall stud. Studs are the vertical wooden framing pieces within your wall.
They provide the most secure and robust support for your shelf and its contents. Use a stud finder to locate them and mount your bracket directly into the stud.
This is the gold standard for a secure live edge floating shelves diy.
Drywall Anchors:
If a stud is not available, you must use heavy-duty drywall anchors. These are designed to expand behind the drywall, creating a secure hold.
Choose anchors that are rated to hold significantly more weight than you expect your shelf to carry.
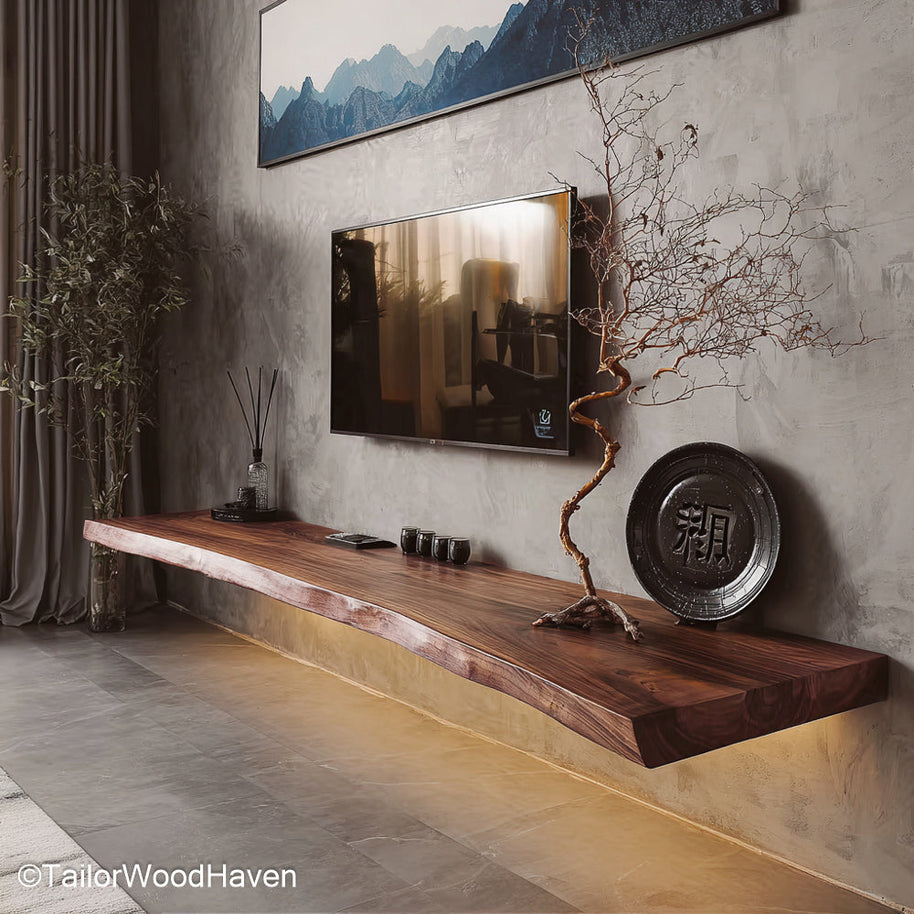
Featuring a bold, matte black finish, these shelves offer a minimalist design and strong support, perfect for high-contrast, contemporary interiors.
Pre-Drill the Bracket:
Once you’ve located your mounting points, use a level to mark the pilot holes on the wall. Pre-drilling makes it easier to screw the bracket in and prevents the wood from splitting.
Final Check:
After installing the bracket and before sliding the shelf on, use your level one last time to confirm it is perfectly straight.
Any minor adjustments should be made at this stage, so your live edge floating shelves diy looks flawless.
The beauty of a live edge floating shelves diy is its versatility. It can be styled to fit a variety of aesthetics and moods, from cozy to modern.
Embrace the shelf's natural character by pairing it with rustic elements.
Decor: Arrange antique vases, vintage books, woven baskets, and distressed metal items.
Color Palette: Use warm, muted tones like beige, cream, and terracotta.
Balance: Use a mix of textures - the smooth wood, the rough-hewn basket, and a soft, knitted blanket - to create a cozy and inviting display.
For a sleek and contemporary look, let the shelf be the star.
Decor: Use a few carefully selected items with clean lines, such as a single ceramic vase, a geometric sculpture, or a minimalist framed photograph.
Color Palette: Stick to a neutral palette of black, white, and gray.
Negative Space: The key to this style is a deliberate use of space. Don’t overcrowd the shelf; let each item have room to breathe and stand out.
A live edge floating shelves diy is perfect for displaying kitchen essentials.
Decor: Use it to store your favorite glassware, a beautiful set of mugs, or a collection of small potted herbs.
Balance: The warmth of the wood beautifully contrasts with the shine of stainless steel appliances, creating a balanced and inviting space.
Functionality: Use hooks underneath the shelf to hang kitchen utensils or mugs, maximizing both display and function. A live edge floating shelves diy in the kitchen is a fantastic way to both declutter and add style.
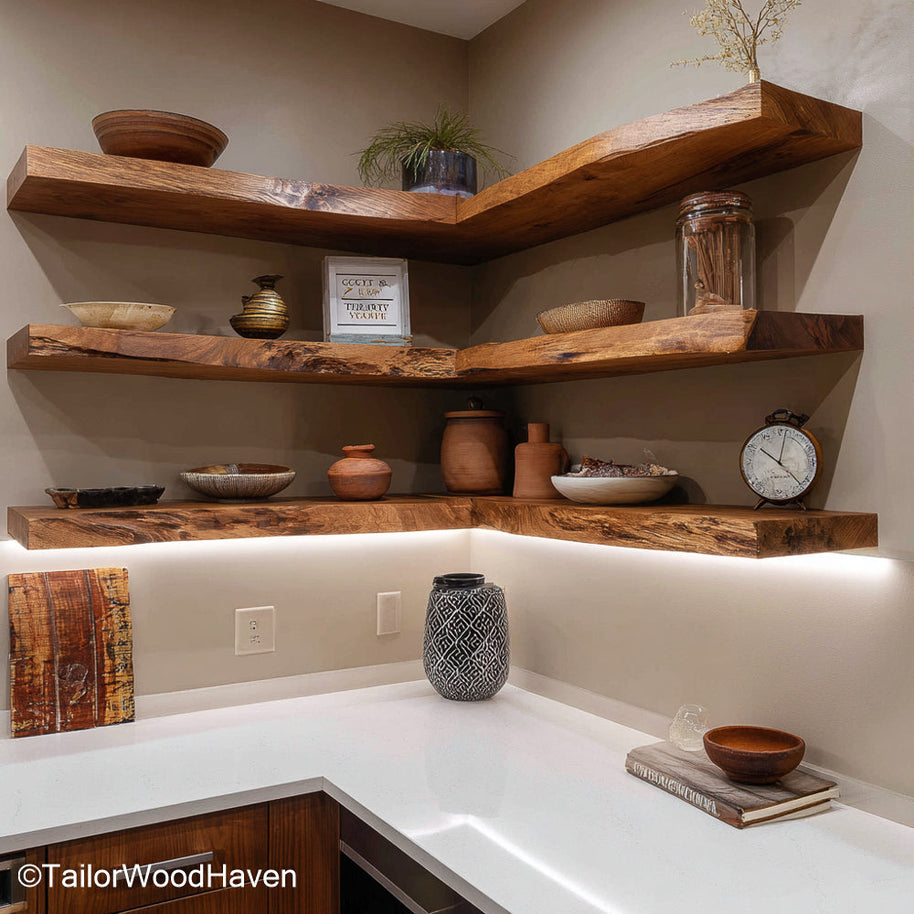
This natural wood corner shelf has a soft live edge, designed with a right angle to efficiently maximize and beautify small corner spaces.
A floating shelf is both beautiful and functional. Here are some of the practical uses for your new live edge floating shelves diy project:
Books: They can hold a curated selection of your favorite books, either standing upright or stacked horizontally for a unique look.
Kitchenware: Ideal for displaying beautiful mugs, bowls, and plates, keeping them easily accessible.
Plants: A live edge shelf is the perfect home for succulents, small potted plants, or trailing vines, which complement the wood's organic feel.
Art Displays: Use the shelf to showcase small framed prints, sculptures, or other art pieces, creating a mini-gallery on your wall.
1. How much weight can these shelves hold?
This depends on the bracket and wall type. A properly installed shelf can often hold 50 pounds or more.
2. Do I need special brackets for a live edge floating shelves diy?
No, any hidden floating shelf bracket that is strong enough for your wood will work.
3. Cost compared to buying pre-made shelves?
DIY is almost always more cost-effective. The main expense is the wood slab itself.
Crafted from natural hardwood, these raw edge shelves showcase beautiful visible grain, ideal for adding a rustic yet refined touch to modern rooms.
A live edge floating shelves diy is more than just a home improvement project; it's a chance to build something that is both economical and unique.
You can transform a raw piece of nature into a beautiful and practical addition to your home, all with your own two hands. The satisfaction of creating a piece of furniture that is truly one-of-a-kind is an unbeatable feeling.


